Printing Tips

Check out my printing tips if you're having problems printing to the right size
If you'd like to support this site and all the free things I post- please check out my Don't Eat the Paste Mandala collection coloring book for 9.99 at Amazon.

Saturday, June 30, 2018

Strawberries, mint and green onions

I love spring and summer so much. Starting in January, I'll start planning what will be planted, start planning my foraging trips with my family to get the ingredients for my salves, teas and foods.

One of my favorite things is watching my perennial plants come back, and being able to make gifts of them to friends. There are a few people who have rhubarb plants that came from my original 10 dollar tiny rhubarb crown, quite a few who are growing raspberries that originally came from 3 plants my kids and I put in over a decade ago, and of course, every year, I give out a bunch of strawberry plants.

My favorite 4 plants to give to friends are mint, strawberries, raspberries and rhubarb. I know the ones I have grow well up here because they've done well for me with minimal care. My initial rhubarb plant is now 5 large rhubarbs!

Propagating the type of strawberries I have is really easy. I have a well established patch and every year, I'll pull up a few large crowns and plant them to let them send runners. The reason I put them in their own pots is that way I can put them somewhere convenient to surround with smaller pots to root the runners.

Runners are long stems with a node or two on them that will root. I'm holding one over the plan in this picture.


I've found this can be a good time to do some decorative planting. In this picture, you see a couple runners planted in a vintage colander I picked up. In fall, I'll dig up the crowns and put them in a larger pot or in a bed. 


But mostly, I just put them in small pots to give to friends to start their own strawberry patches. I use the same soil mix that I do for my garden. Any basic container mix works just fine. Strawberries are pretty hardy. 

I'll use a small piece of wire bent into a U to pin the node on the runner in place until it roots.  The pin is sticking up here. I pushed it in right after this photo was taken. I've also used hair pins in a pinch. 

When it starts looking like a plant and growing new leaves, you can tug slightly on it to see if it's established roots. If it has, cut the runner between the mother plant and your new baby strawberry. 


Mint is super easy to propagate. It will root in water.  Cut longish stems, and strip all but the top few leaves from the stem. The leaves you strip can be dried for tea, used as garnish or my favorite? Dumped in a glass of cold water to flavor it. 

These are chocolate mint plants that I'm starting now. They will go in a sunny window indoors and I'll switch the water very 3-4 days. In a couple weeks, they will develop more leaves, and start growing roots as well. 
When they have some nice roots on them, you can take them out of the water and put them in soil. That's what I did with these plants. They were transplanted into a pot directly outdoors a couple weeks ago  It's a different type of mint! 

Obligatory mint warning!
Mint will grow everywhere given a chance. It's generally a very neighborly thing to keep it contained.

A few of my friends will get pots set up for indoor growing using an indoor medium, some will get outdoor plants they can choose what they will do with it.

The next one isn't a gifting plant- but it's one of The Amazing Turnip Girl's favorite plants because as she puts it "Green onions are the easiest thing to pirate!!"

I swear she watches for the first batch of green onions I buy for a recipe in spring. She cuts them down but leaves the white bulbous ends to put in dirt. Then through out summer, she keeps it watered and cuts fresh green onions as wanted or needed for recipes.


Monday, June 11, 2018

Dandelion Jelly!!

Dandelion jelly recipe

Most of the time, we have enough dandelions in our yard for fried dandelions but not much past that because we really love fried dandelions. This year though has been a banner year for those happy sunshine flowers.

I know my yard has not been touched with weed killers or dangerous chemicals in the 16 years we've lived here, so I don't have any problems with harvesting from my yard.

My daughter is the jelly and jam maker in our home. She was enthused about trying this recipe from her grandmother.

Well, until I told her we had to pick about 11 cups of dandelions.
But picking the petals off of them went a lot faster with 3 of us. We just pinched the green ends off, then peeled off the green to get all the petals. It wound up being 8 cups of petals total.

So this is a recipe we don't double- but we do make enough tea to make 2 batches back to back.

We used pint jars because well, we do use pint jars usually for personal use jellies and jams. If you're going to gift it, use half pints.

This recipe makes about 2 pints or 4 half pints.

You will need:

5 cups of blossoms- cut and pick the green parts off, use only the white and yellow parts
4 cups of boiling water
3 Tbs. lemon juice
6 Tbs of powdered pectin
4 1/2 cups of sugar

First you'll make a dandelion tea. Pour the boiling water over the petals in a non-reactive bowl cover, and let steep at least until room temperature. We let it go overnight which made an orange-y yellow tea.

Strain the blossoms out of the tea, and press lightly. Pre-measure your sugar.

Measure 3 cups of dandelion tea into a pan, add the lemon juice and pectin and bring to a boil.

Add the sugar, bring back to a boil and let it boil for 2 or 3 minutes.

Put in jars leaving 1/4 inch head space and water bath process for 10 minutes.

It tastes like a honey jelly, bright and sunshine-y. It's delicious with Brie on crackers, which is how we have it served in the photo above.

It's absolutely a new family favorite, and despite the time it took to get just the petals, TG plans to make it again!

Tuesday, June 5, 2018

Soft triangle baskets- sewing project

Triangle soft felt baskets sewing project

This is going to be a tutorial with a LOT of photos for a very simple project because the start of learning how to do this is learning how to fold and cut an equilateral triangle for a pattern out of any size rectangle of paper. In the near future there should also be a video made by my daughter.

The angles of any triangle add up to 180°. For an equilateral triangle, that means each angle is 60°. Folding 90 and 45 degree angles is easy, here you will learn how to fold a 60 degree angle. 

The table I'm working on is a small poly table that was originally bought as a side table for sitting outside to put my iced coffee on. It became the surface my daughter used to spray paint all sorts of things for her costumes and projects.

The sheet of paper is a piece of junk mail from an insurance agent. We get so many of them that they get used for shopping lists, paper patterns and all sorts of other scratch paper purposes. Reduce, reuse, recycle!!

This project can be done with felted sweaters, craft felt, even fun foam. Anything that won't ravel and has a bit of body. It makes a fantastic sewing project for kids.

You will need:

  • paper
  • scissors
  • pen
  • felt
  • straight pins
  • size 20 tapestry needles
  • embroidery floss 

To make the pattern:
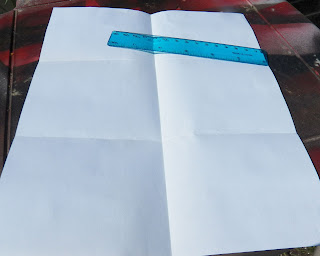
Start by folding your sheet of paper in half lengthwise- or like a hot dog if you learned it that way! And unfold. 
Folding and cutting an equilateral triangle
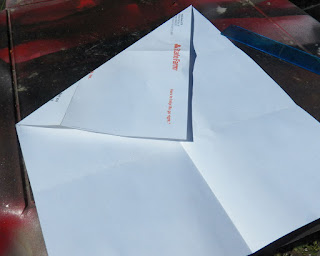
Now you're going to take one corner, and fold it into the center, the top edge of the paper from the corner you're folding should be a line down to the other corner. 
Folding and cutting an equilateral triangle
Now fold the other side over the open edge of the angle you just folded. 
Folding and cutting an equilateral triangle

Folding and cutting an equilateral triangle
When you unfold it, you'll have two lines to cut to make the triangle. 

Folding and cutting an equilateral triangle
I used this 60° angle to show the angle you got with your folds. 
Folding and cutting an equilateral triangle

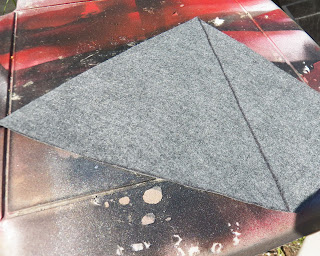
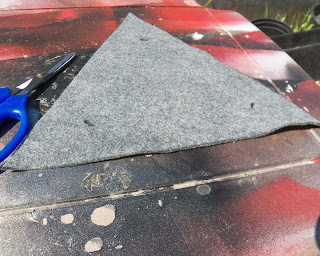
Now trace your shape on your fabric, and cut it out. 
sewing project- soft triangle basket

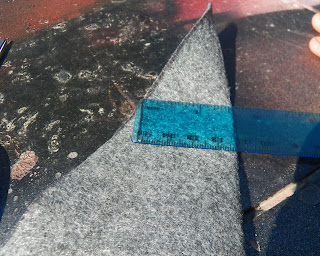
Now it gets really easy. You're going to cut into the corners bisecting them to make the sides. 
To figure out the depth of your finished box, you'll measure from the center to the edge perpendicular to the center line.
sewing project- soft triangle basket
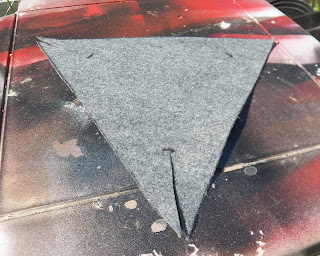
Measure in from each corner and mark them all the same length. 
sewing project- soft triangle basket
Cut a straight line down each one. 
sewing project- soft triangle basket
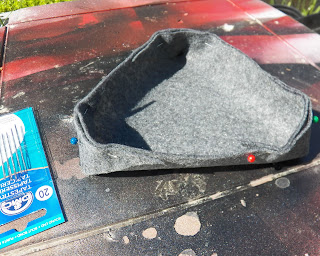
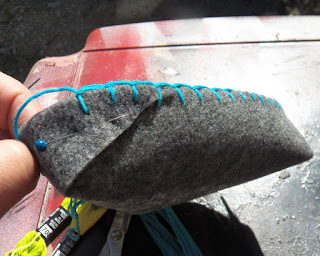
Now you'll pin each corner, make sure the outside flaps are all facing in the same direction, and pin the cut edges so they match up with the top of the basket on the facing edge. 
sewing project- soft triangle basket

Now you can choose how you'll stitch it. For the gray basket, I only stitched the top edge. 6 strands of embroidery floss will fit in a size 20 tapestry needle. 

Blanket stitch or whip stitching work for the edge. 

sewing project- soft triangle basket
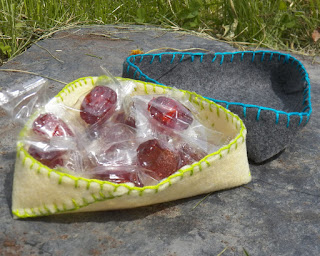
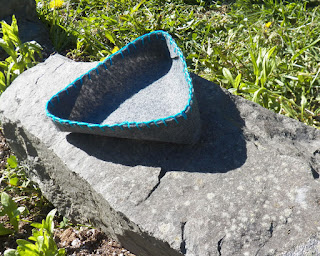
Here's the finished gray basket. 
sewing project- soft triangle basket

For the cream basket, I stitched the outer corners on the side that showed on the outside, then stitched the top.