Pages
▼
Thursday, December 21, 2017
Chocolate Salted Caramel Cherry Fudge Recipe Featuring Eagle Brand Sweetened Condensed Milk
Fudge!! Oh how I love fudge. My family has been using Eagle Brand Sweetened Condensed Milk for generations.
Fudge is one of those last minute things that is going to impress if it's got a silky texture and it's really easy to make it fancy and on trend.
Today we made a nice big pan of a subtly two toned fudge to give as gifts- or at least as much as my husband will allow out the door. I suspect he's going to decide a lot of people get cookies instead! The first thing he said when he tasted it is "It's not grainy, it's perfect fudge!"
Ingredients:
1 bag semi-sweet chocolate chips
1 bag milk chocolate chips
1 1/4 cup white chocolate chips
3/4 cup caramel chips - I used Ghiradelli brand for all the chips.
1 stick butter (8 Tbs) + extra for buttering the waxed paper for easy release
2 cans Eagle Brand Sweetened Condensed Milk
2 jars of maraschino cherries- my own preference is for Tillen Farm's cherries with no artificial colors or flavors
2 tsps. vanilla
Caramel sauce
Nice flake salt- I used an Alaskan sea salt that's made small batch in Sitka.
Supplies:
9x13x2 inch pan and wax paper to line it
1 large sauce pan
Spoon and silicone spatula
Line the 9x13 pan with waxed paper, and butter it lightly
In the sauce pan, combine
1 bag semi-sweet chips
3/4 cup milk chocolate chips
1/4 cup caramel chips
1 can Eagle Brand Sweetened Condensed Milk
1/2 stick (4 Tbs.) butter
Cook over low heat, stirring constantly until it's all melted and combined. Remove from heat, stir in 1 tsp. vanilla. Pour into pan, spread it evenly.
In the same pan-
the rest of the bag of milk chocolate chips
1 1/4 cup white chocolate chips
1/2 cup caramel chips
1 can Eagle Brand Sweetened Condensed Milk
1/2 stick (4 Tbs.) butter
Cook over low heat, stirring constantly until it's all melted and combined. Remove from heat, stir in 1 tsp. vanilla. Pour into pan, spread it evenly over first layer.
Put the cherries on top evenly spaced. Chill.
Add a drizzle of caramel sauce, cut into cubes, and put on a lightly sprinkle of salt.
Check out Eagle Brand to find a lot more recipes.
This post was sponsored by Eagle Brand- all opinions are mine.
Wednesday, December 6, 2017
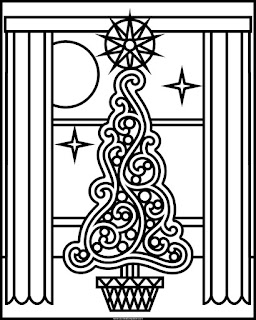
Holiday tree to color
Click the images below for large versions to print and color.
small jpg version:
large transparent png version:
If you're looking for last minute presents, please consider buying my self-published coloring book featuring some of the best of the mandala coloring pages posted on this site-
Monday, November 13, 2017
Knotwork Snowflake Coloring Page
There is snow on the ground here. Not yet enough to go sledding, but it's definitely winter.
I hope you enjoy this knotwork snowflake coloring page. Click the images below for a blank version to print and color.
Small jpg version:
Large transparent png version:
Sunday, November 5, 2017
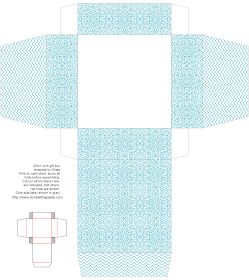
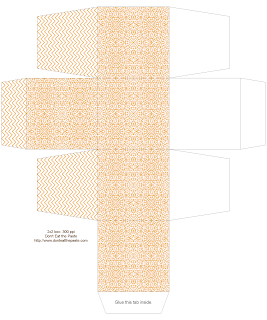
Fancy Tiles printable gift box
I've had these tile sets in my head for days, and my daughter picked up some towels recently which had a simple trellis design that reminded me to stop thinking about them and just draw them.
I hope you enjoy this as a all-occasion printable gift box!
Click the images below for larger versions to print on card stock. Print, cut out, score folds, fold, glue!
3 colors, 2 sizes.
Friday, October 27, 2017
Swirly Skull Coloring Page
It's that most spooktacular time of the year! I'm sorry that I haven't done nearly as much Halloween posting as usual, but you can find a whole bunch of Halloween projects by clicking the link below.
HALLOWEEN
I hope you enjoy this coloring page. It needs to be printed on landscape settings.
Click the images below for larger versions. Print on landscape settings.
small jpg:
large transparent png version:
Thursday, September 21, 2017
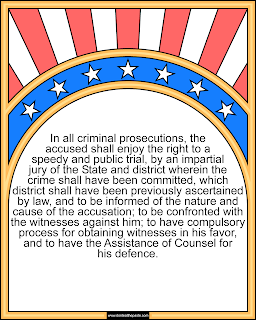
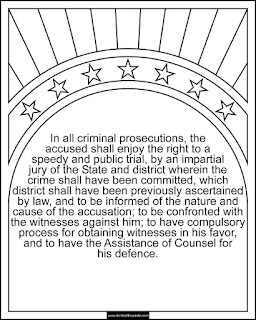
6th Amendment Coloring Page- Bill of Rights series
The 6th Amendment! Over halfway done with the Bill of Rights series of coloring pages.
Click the images below for larger versions to print and color.
Small jpg version:
In all criminal prosecutions, the accused shall enjoy the right to a speedy and public trial, by an impartial jury of the State and district wherein the crime shall have been committed, which district shall have been previously ascertained by law, and to be informed of the nature and cause of the accusation; to be confronted with the witnesses against him; to have compulsory process for obtaining witnesses in his favor, and to have the Assistance of Counsel for his defence.
Click the images below for larger versions to print and color.
Small jpg version:
Large transparent png version:
First Amendment to print and color.
Second Amendment to print and color.
Third Amendment to print and color.
Fourth Amendment to print and color.
5th Amendment to print and color.
Monday, August 28, 2017
Swirly Heart coloring page
I love drawing swirls and hearts. So here's another swirly heart coloring page. If you like swirls and hearts too- be sure to click the tags at the bottom of the post for more swirly heart projects!
Click the images below for larger versions to print and color!
Small swirly heart coloring page (jpg format)
Large swirly heart coloring page (transparent png format)
Wednesday, August 16, 2017
Liberty Enlightening The World coloring page
The full name of the statue we know with so much love as Lady Liberty or The Statue of Liberty is "Liberty Enlightening The World". That torch she carries is supposed to be a guide, a symbol of light in the darkness.
The images of a mob carrying torches is going to stick with us for a long time. Let's remember this torch too.
Click the images below larger versions to print and color.
Small jpg version:
Large transparent png version:
You can make a donation to the Southern Poverty Law Center here.
Monday, August 7, 2017
Peace symbol coloring page
I hope you enjoy this peace symbol coloring page. Click the blank versions below for larger versions to print and color.
Small jpg version:
Large transparent png version:
Sunday, July 30, 2017
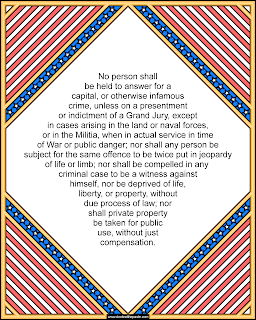
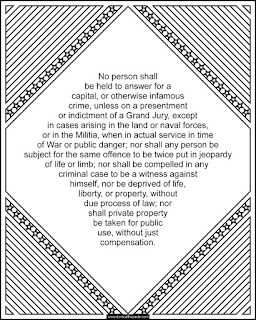
5th Amendment Coloring Page- Bill of Rights Series
5th in my Bill Of Rights series- it's the 5th Amendment of the Constitution of the United States to print and color! I hope you enjoy it.
No person shall be held to answer for a capital, or otherwise infamous crime, unless on a presentment or indictment of a Grand Jury, except in cases arising in the land or naval forces, or in the Militia, when in actual service in time of War or public danger; nor shall any person be subject for the same offence to be twice put in jeopardy of life or limb; nor shall be compelled in any criminal case to be a witness against himself, nor be deprived of life, liberty, or property, without due process of law; nor shall private property be taken for public use, without just compensation.Click the images below for larger versions to print and color.
Small jpg version:
Large transparent png version:
First Amendment to print and color.
Second Amendment to print and color.
Third Amendment to print and color.
Fourth Amendment to print and color.
Saturday, July 15, 2017
Rainbow Gift Boxes
It's been a while since I've posted printable boxes. These are simple, but were a lot of fun to draw. I hope you enjoy them.
Click the images below for larger versions. Print on card stock, cut out, score folds, fold, glue.
2x2x2 inch cube box:
3x3x1 inch box:
Sunday, July 9, 2017
Blue Flower Purse (tutorial, not a pattern)
I'm trying to remember my exact stitches for making the purse, but to be honest, I love stitch techniques, but patterns mostly.. well.. I tend to make them up as I go, so this is actually more the technique like my dice bag.
I used worsted weight cotton and a size F hook for this, so the stitches are tight enough to not need lining. It's the same thing I use for all my tapestry crochet purses and I've used some of them for years. The rings are macrame/craft type rings, the bracelet sized ones. Yeah.. I use a lot of them, they cost a lot less then handles or bracelet forms. These things run around 40¢ each.
You will also need stitch markers. I used pieces of a contrasting yarn. 4 of them.
For a purse this size, I used a ball of yarn, a bigger purse will take more yarn, to felt it, you'd use a bigger hook and more yarn. Again, not really a pattern, more the technique.
Let's see.. if I recall correctly, I chained 16 and worked 2 single crochets in the second chain from the hook,stitch marker goes in the second sc, sc down side, and sc with stitch marker in the final chain, 2 sc in same chain, sc with stitch marker in same ch, then sc down the side, in the first chain you worked the first 2 stitches in, do on sc with a stitch marker, and then one final sc, slipstitch to join.
Chain 1,(does NOT count as first stitch) sc in same stitch, sc in next stitch,move marker and sc in same stitch, sc in same stitch. See? That's the corner and the increases. 3 sc in one stitch with the stitch marker in the middle sc.
Crochet down the side to the stitch with the stitch marker and do the same 3 sc thing, moving the stitch marker, et cetra.. you can see where this is going right?
So keep increasing rounds making a rectangle until it's the size you want, then do 5 rows plain, moving the stitch marker up each row so you can keep track of where your increases are, then in the 6th row, increase in those stitches and move the markers to the middle stitch in the 3 sc groupings. 5 rows plain, increase.
Of course if you want a more subtle angle, you would put in more rows, for a wider angle, less rows. If you keep them regular you will get a nice angled look.
Keep going until it's the size you want.
Flowers- (if you're curious. There are tons of flower patterns out there) chain 6, slipstitch to join, chain 2, dc, triple, dc, chain 2, slip stitch in ring, repeat 4 times, slipstitch to join to the stitch the chain 2 are coming out of, weave ends in. Contrasting color, chain 2 or use loop method, 6 sc in first ch, slipstitch to join, sew the flower on to the bag with the yarn end of the flower center.
Leaf- Chain 6, 2 sc in 2 ch from hook, dc in next 3 stitches, 2 sc, ch 3, sc in final ch, dc in next 3 stitches, 2 sc in final ch, slipstitch to join.
Easy Knit Kerchief Pattern
I'm a beginner at knitting, and I'm attempting to figure out my notes here. Please comment below if you see a mistake. If you're a beginner, I've linked the stitch abbreviation "glossary" to youtube videos. If you need help in casting on and casting off, check out the rest of The Knit Witch's videos. In the comments on the one for SSK someone asked how it was different from k2tog, this kerchief is an excellent example, because I tried just k2tog first, and it looked all wrong. It's the way the decreases lean, one half looked nicely knit, the other half the stitches looked twisted.
I used size 8 needles,a size G crochet hook, and worsted weight cotton, Peaches & Creme in the Fiesta Ombre.
Cast on 4
K= knit P= purl yo= yarn over k2tog= knit 2 together ssk= slip, slip, knit
Row 1: k4
Row 2: k2, yo, k2
Row 3: k2, yo, k3
Row 4: k2, yo, k4
Row 5: k2, yo, k5
Row 6: k2, yo, k6
Row 7: k2, yo, k7
Row 8: k2, yo, k2, p2, k4
Row 9: k2, yo, k9
Row 10: k2, yo, k2, p4, k4
Row 11: k2, yo, k11
Row 12: k2, yo, k2, p6, k4
Row 13: k2, yo, k5, yo, k2tog, k6
Row 14: k2, yo, k2, p8, k4
Row 15: k2, yo, k5, yo,k2tog, yo, ssk, k6
Row 16: k2, yo, k2,p10,k4
Row 17: k2, yo, k5, yo,k2tog, k2, yo, ssk, k6
Row 18: k2, yo, k2, p12, k4
Row 19: k2, yo, k5, yo, k2tog, k4, yo, ssk, k6
Row 20: k2, yo, k2, p14, k4
Row 21: k2, yo, k5, yo, k2tog, k2, yo, k2tog, k2, yo, ssk, k6
Row 22: k2, yo, k2, p16, k4
Row 23: k2, yo, k5, yo, k2tog, k2, yo, k2tog, yo, ssk, k2, yo, ssk, k6
Row 24: k2, yo, k2, p18,k4
Row 25: k2, yo, k5, yo, k2tog, k2, yo, k2tog, k2, yo, skk, k2, yo, ssk, k6
Row 26: k2, yo, k2, p20,k4
Row 27: k2, yo, k5, yo, k2, yo, k2tog, k2, k2tog, k4, yo, ssk, k2, yo, ssk, k6
Row 28: k2, yo, k2, p22, k4
Row 29: k2, yo, k5, yo, k2tog, k2, yo, k2tog, k2, yo, k2tog, k2, yo, ssk, k2, yo, ssk, k6
Row 30: k2, yo, k2, p24, k4
Row 31: k2, yo, k5, yo, k2tog, k2, yo, k2tog, k2, yo, k2tog, yo, ssk, k2, yo, ssk, k2,yo,skk, k6
Row 32: k2, yo, k2, p26, k4
Row 33: k2, yo, k5, yo, k2tog, k2,yo, k2tog, k2, yo, k2tog, k2, yo, ssk, k2,yo, ssk, k2, yo, ssk, k6
Row 34: k2, yo, k2, p28, k4
Row 35: k2, yo, k5, yo, k2tog, k2, yo, k2tog, k2, yo, k2tog, yo, k2tog, yo, ssk, yo, ssk, k2, yo, ssk, k2,yo, ssk, k6
Row 36: k2, yo, k2,p30, k4
Row 37: k2, yo, k5, yo, k2tog, k2, yo, k2tog, k14, yo, ssk, k2, yo, ssk, k6
Row 38: k2, yo, k2, p32, k4
Row 39: k2, yo, k5, yo, k2tog, k2, yo, k2tog, yo, k2tog, yo, k2tog, yo, k2tog,yo, k2tog, yo, ssk, yo, ssk, yo, ssk, yo, ssk, yo, ssk, k2, yo, ssk, k6
Row 40: k2, yo, k2, p34, k4
Row 41: k2, yo, k5, yo, k26, k2tog, yo, ssk, k6
Row 42: k2, yo, k2, p36, k4
Row 43: k2, yo, k5, yo, k2tog, yo, k2tog, yo, k2tog, yo, k2tog, yo, k2tog, yo, k2tog, yo, k2tog, yo, k2tog, yo, ssk, yo, ssk, yo, ssk, yo, ssk, yo, ssk, yo, ssk, yo, ssk, yo, ssk, k6
Row 44: k2, yo, k2,p38 ,k4
Row 45: k2, yo, k45
Row 46: k2, yo, k46
Row 47: k2, yo, k47
Row 48: k2, yo, k48
Bind off, insert crochet hook into the last loop, and chain 60, then slip stitch back up the chain, and sc loosely along the sides of the triangle, not the long edge (or hypotenuse), when you reach the top of the other side, chain 60, slip stitch back up the chain, break off yarn, and weave in ends. The little image below shows where to do the crocheted edging.
I actually worked mine off a graph I drew. Here's two versions, the color-coded one I used, and a plain graph. Notice that the pattern has one more row then the graph.. that's because when I finished the graph, I decided I needed another row. On the color coding, salmon is purl, purple is yo, I left the k2tog white, but marked the ssk with green so I could count them easily.
And here's a blank graph if you want to design your own.
Bubble Necklace
Bubble Necklace
Size 10 crochet cotton
Size 7 hook
Tapestry needle
scissors
one of those bubble things for weddings I bought a box of 50, but hopefully you know people who might have them or who you can share them with, or if you want, you could make them for craft shows and the like.
Ch 2 or magic ring start.
Rnd 1: sc 6 times in first ch or magic ring, sl st to join.
Rnd 2: ch 1 (doesn't count as first stitch) 2 sc in each st, sl st to join (12 sts)
Rnd 3-4: ch 1 (doesn't count as first stitch) sc in each st, sl st to join (12 sts)
Rnd 5: ch 1(doesn't count as first stitch) sc in same stitch, *ch 3, skip stitch, sc in next st* repeat ** 4 more times, on the last loop, ch 1, dc in first sc (6 loops)
Rnd 6-20: ch 1 (doesn't count as first stitch), sc in loop, *ch 3, sc in next loop*, repeat ** 4 more times, ch 1, dc in first sc (6 loops)
Rnd 21: ch 1 (doesn't count as first stitch), sc in loop, ch 1, *sc in next loop, ch 1* repeat ** around, sl st to first sc (6 ch 1 spaces)
Rnd 22-23: ch 1 (doesn't count as first st), sc in each stitch and space around. sl st to join. (12 sts)
Chain a length long enough to slip over your head (or a child's head) easily, slip stitch to join on the other side, sl st back up the ch, sl st in starting st, break off and weave in ends. Put the bubble tube in it.
Monday, July 3, 2017
4th Amendment Coloring Page- Bill of Rights Series
4th in my Bill Of Rights series- it's the 4th Amendment of the Constitution of the United States to print and color! I hope you enjoy it.
The right of the people to be secure in their persons, houses, papers, and effects, against unreasonable searches and seizures, shall not be violated, and no Warrants shall issue, but upon probable cause, supported by Oath or affirmation, and particularly describing the place to be searched, and the persons or things to be seized.
Click the images below for larger versions to print and color.
Small jpg version:
Large transparent png version:
First Amendment to print and color.
Second Amendment to print and color.
Third Amendment to print and color.
Thursday, June 29, 2017
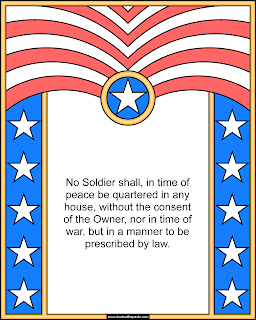
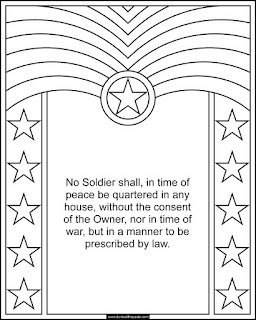
3rd Amendment Coloring page- Bill of Rights series
No Soldier shall, in time of peace be quartered in any house, without the consent of the Owner, nor in time of war, but in a manner to be prescribed by law.
This is the 3rd of my Bill of Rights series.
I hope you enjoy it. Click the images below for larger versions to print and color.
Small jpg:
Large transparent png:
You can find the rest of them here:
First Amendment to print and color.
Second Amendment to print and color.
Third Amendment to print and color.
Tuesday, June 20, 2017
Rhubarb-Orange Marmalade
So this marmalade came into being because we have a LOT of rhubarb. Last year, at the beginning of spring, my husband and I split our plant into 8 smaller plants. We gave away 4 of them, and kept 4. Those divisions were fairly large and now I have 4 huge plants.
My rhubarb is green. It's a Victoria-type that's very sweet, very tender and tends to have thinner stalks that get very long. The bottoms are red, but the lengths are a celery green.
Those oranges are fairly large oranges.
There are a lot of recipes for orange-rhubarb marmalade on the internet. They call for various cooking methods and varying amounts of the ingredients. Sometimes they have nuts or spices in them. Our recipe is fairly simple, but it's really tasty. My daughter did the cooking. I did the harvesting and gave her the recipe.
Rhubarb-Orange Marmalade- makes 3 pints of marmalade
You will need:
7 cups of rhubarb (12-15 stalks)
2 large navel oranges
6 cups of sugar
2 cups of water
Wash your fruits. Anything that you grow yourself and you know what gets on it, you can decide how best to wash it. For oranges from the store, wash with a bit of soap and water. For store bought rhubarb, dunk it in 1:4 vinegar water mix, scrub lightly, then rinse.
Zest the oranges into a bowl using a paring knife, microplane or vegetable peeler. After that, cut the orange into quarters, and cut off the peel and pith. Then cut the quarters in smaller pieces and put them in the bowl.
Cut the rhubarb into half inch pieces. This might require cutting them in half length-wise then chopping them into smaller pieces.
Put the rhubarb, oranges, sugar and water into a heavy bottomed 5 quart pan and bring to a boil. Turn it down and let it simmer for about an hour stirring frequently. It will thicken. Check it by lifting the spoon, when it sheets off the spoon, it's ready.
While you're doing that, prepare your jars. We used a combination of 4 oz jars and those gorgeous Ball Canning Elite Jelly Jars that are in the photo.
Fill the jars leaving a 1/4 inch headroom, remove bubbles, wipe rims and process jars (hot water method) for 10 minutes.
This makes a lovely, tart and sweet marmalade that is delicious on pancakes according to my daughter who is eating some just that way right this moment. Me? It's hard not eating it just by the spoonful, but I'm looking forward to trying it on chocolate ice cream.


