Pages

Sunday, October 25, 2015

Nearly Instant Halloween Accessories


Spider Bobby Pin Tutorial

I love this time of year. You can find all sorts of delightfully creepy things at the store, and shops open up just for Halloween.

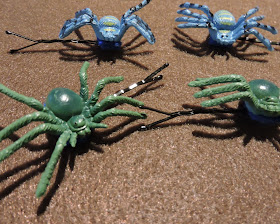
I bought some very inexpensive spiders and bats to make accessories. The reason I got bright, colorful spiders is that they are less disturbing to the arachnophobe in my family.
To make the hair slides- the easy way is to use bobby pins that have a gluing pad. The thing is I don't actually like using those in my hair. So I did something a little different so I could use my preferred bobby pin type-

So for there easy spider hair pins, you will need:

  • Bobby pins 
  • Instant type glue (I used Krazy Glue)
  • White craft glue (I used Elmer's Glue All)
  • Craft felt
  • Plastic spiders with a largish body
  • scissors
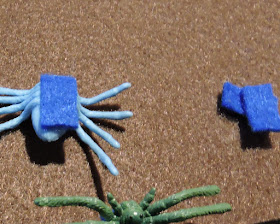
Craft felt is made out of plastic, so are the spiders. Krazy Glue works great for bonding them together. Cut 4 strips per pair of spiders of craft felt that are about 1/4 inch wide and the length of the spider body. Glue one strip to the bottom of each spider. 
Spider pin tutorial 2

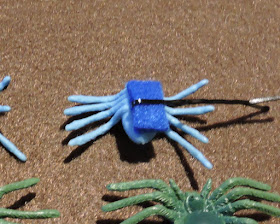
Slide the other strips into the bobby pins, and spread white craft glue on the craft felt on the spider, then press the strip in the bobby pin to the spider and hold for a couple minutes. Let the glue dry. 
Spider pin tutorial 3

Wow. See? Insanely easy. Now you could do a lot to the spiders before gluing them to the bobby pins. You could cover them in glitter, or use a plastic safe metallic spray paint on them. Make them as fancy as you'd like. 

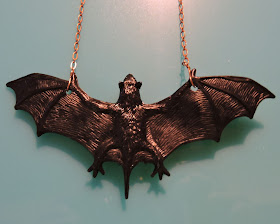
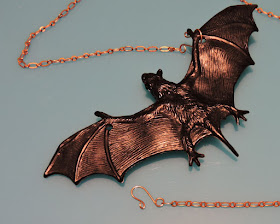
Bat necklace!
Same thing, if you want, you can absolutely glitter or paint the bat. I went with plain black for mine. 
Bat necklace tutorial

So for this one- you will need
  • Plastic bats- they come in all sorts of colors. I have some that are neon green!
  • chain
  • 22 gauge wire- half hard if you have it.
  • round nose pliers
  • wire snips
  • 1/8 inch hole punch
So this is just as easy as the project above, and if you're a jewelry crafter- you might have the supplies on hand. I used some copper chain that I had, and bronze 22 gauge wire. Bronze is fairly hard compared to copper- if you're using a soft wire, lightly hammer the hooks before attaching them to the chain to harden them slightly. 

Punch a hole in the top of both wings with the hole punch. Then cut 2 1.5 inch pieces of wire and coil the top into a loop, then curl the rest into a hook with a little bit curled over at the end. 
bat necklace tutorial
Put one wire on each end of the chain, and slide through the holes in the bat wings. 


Back in 2011, I posted a project for Eyeball hair sticks using the plastic eyeballs that available this time of the year. That project is also an instant costume. Moms always have eyes in the back of their head! 
Eyeball hair sticks


Sunday, October 18, 2015

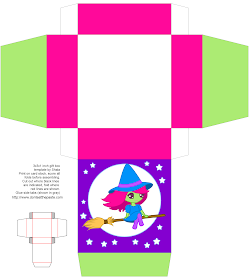
2015 Witch box

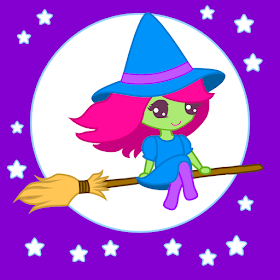
chibi witch- with a printable gift box

The witch box for 2015!
Click the image below for a larger version, print this box on card stock, cut out, score fold lines, fold, glue to assemble this cute little Halloween gift box.

Printable witch box from Don't Eat the Paste


Friday, October 16, 2015

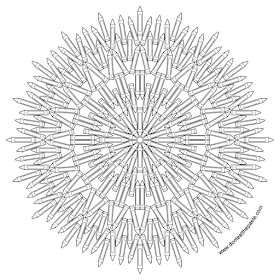
Crayon Mandala- intricate version

Crayon mandala- blank available for coloring
Back in 2013, I drew a simple crayon mandala for back to school.  That mandala recently got shared on one of the coloring groups on Facebook, and people were talking about using it as a way to catalog pencil colors. The more people commented, the more I wanted to put together a more complicated version.

So here it is. A more complicated version of my crayon mandala to print and color. You probably aren't going to want to use crayons for it. Click the versions below for large versions to color.

Sm. jpg version:
Crayon mandala to print and color- available in JPG and transparent PNG versions.

Large transparent PNG version:
Crayon mandala to print and color- available in JPG and transparent PNG versions.


Tuesday, October 6, 2015

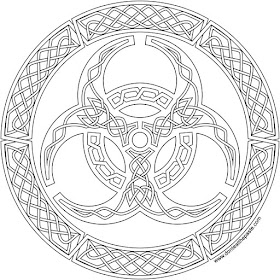
Biohazard Knot for zombie lovers (coloring page)

Biohazard symbol knotwork- blank coloring page available

It's October- which means zombies, Halloween and Supernatural. Okay, Supernatural has absolutely nothing to do with this knotwork, but I'm really, really excited about it.

I hope you enjoy this knot to color as much as I enjoyed drawing it. It's a biohazard symbol, which are frequently used in pop culture zombie movies and merchandise.

Click the images below for larger version to print and color.

Small JPG:
A biohazard symbol in knotwork to print and color in jpg and transparent PNG format

Large transparent PNG:
A biohazard symbol in knotwork to print and color in jpg and transparent PNG format


Looking for some great zombie themed gifts?

Friday, October 2, 2015

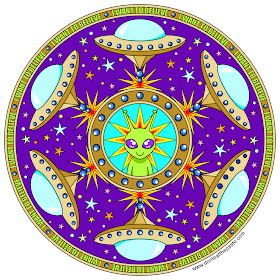
Alien Mandala to print and color

I want to believe alien mandala- blank version available to color
I hope you enjoy this alien mandala to print and color!

If you're an X-files fan, you'll recognize the phrase "I want to believe" around the edge- and you're probably as excited as I am about the return of the show.

If you're an old talk radio fan who enjoys Art Bell, you'll be glad to know he's back with Midnight in the Desert. You can learn more at Artbell.com including local listings or if it's not available locally, you can ask your local provider about the show. (no affiliation at all, my husband and I are just long time fans)

So! Here's the mandala to print and color. Click on the images below for larger versions!

Small jpg:
I want to believe alien mandala to print and color- available in jpg and transparent PNG versions. #coloring

Large transparent png:
I want to believe alien mandala to print and color- available in jpg and transparent PNG versions. #coloring


Thursday, October 1, 2015

Super Speedy Sari Silk Shawl (crochet)

Super Speedy Sari Silk Shawl pattern using Darn Good Yarn


I couldn't resist the alliteration, but if I were going to give it another name, it would be Rainbow Crow shawl, because the soft effect of the frayed edges of the recycled sari silk ribbon and all the colors reminds me of the story of Rainbow Crow.

By super speedy- you can make a small version of this shawl in an evening with 4 skeins of Darn Good Yarn's Tibet Jewels. The full sized version in my photos is made using 7 skeins and took 2 evenings of tv watching. Probably 6 hours? Maybe less.

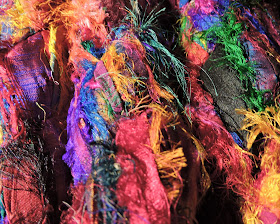
Tibet Jewels is the easiest of the sari ribbons I've found to wind into balls, and it has so much texture and color it's just amazing.

Tibet Jewels by Darn Good Yarn
The 4 ball version- the finished size without the fringe is 52 inches along the hypotenuse and 26 inches deep.

You will need:

  • 7 (or 4) balls of Tibet Jewels 
  • Size S crochet hook 
  • Scissors
  • Size P crochet hook for putting on the fringe


So this is a bottom up shawl, and once you start, it just flies off your hook.
American terminology
Stitches used:
ch=chain
sc=single crochet
tr= treble crochet
sl st= slip stitch
st or sts= stitch or stitches

Chain 7, sl st to join in a ring

Row 1: Chain 5, sc in ring, ch 2, tr in ring (2 loops)
Row 2: Ch 5, sc in same loop, ch 3, sc in next loop, ch 2, tr in 3rd st of ch 5 from previous row (3 loops)
Row 3: Ch 5, sc in same loop, ch 3, sc in next loop,ch 3, sc in next loop, ch 2, tr in 3rd st of ch 5 from previous row (4 loops)
Row 4: Ch 5, sc in same loop, ch 3, sc in next loop, work across the same way- at the last loop, ch 2, tr in ch 3 of beginning ch 5 of previous row.
Keep repeating Row 4. Each row will be one loop wider than the row before it.

For the 4 skein variation- when you get close to the end of the 3rd ball of yarn, finish that row and if you need to add in the 4th skein to finish, do that. Then break off leaving the tail long enough to be one of the fringe, and cut your fringe. Put a fringe at the base of each row along the short sides, and one in the center of the beginning chain 7.

For the 7 skein variation- complete 26 rows, and break off leaving a 13 inch tail. Cut 53 fringe pieces 26 inches long (if you want it like mine, shorter fringe is fine) and put one fringe at the base stitch of each row. (where the rows join)

Attach the fringe by inserting your P hook into the stitch at the base of each row- where they join up, and fold the fringe in half, pull a loop though, then pull the ends through the loop.

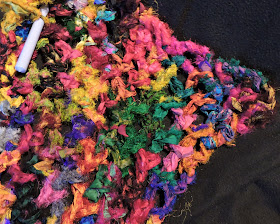
This is 3 balls crocheted up-
Tibet Jewels shawl in progress