Pages

Friday, June 28, 2013

Red, White and Blue Popcorn Box

A printable red, white and blue treat box for the 4th of July


It's been a while since I've done a 2 page box, but this popcorn box seemed like a good idea. You'll need to print out both pages at "fit to page" or 8x10 inches. The finished box is 6 inches tall, 4 inches wide, and 2 inches deep. It will hold just over 3 cups of popcorn! The spots on the image above aren't on the box you'll print. They are buttery fingerprints.
Click the images for larger versions to print.
Assembly Instructions:

Page 1 of the popcorn box-

Page 2 of the popcorn box-


If you're wondering why the version in my photo has that nice vintage, soft color and the versions above don't, it's because I printed it on Astroparche card stock in Natural. Astroparche is affordable, and adds a nice effect to a lot of printables. 


You can get it from Amazon.com using the link below. Amazon links help support this site and my reading habit.

Thursday, June 27, 2013

Mountains- Photo post


The photo above is my son, right after he said "I'm glad I live in Anchorage, Alaska." Because sometimes we say things that are obvious. We are very glad to live here!

Yesterday, we went to Flattop. If you're ever in Anchorage, Flattop is worth the trip. Even if you don't hike. If you do hike, the bottom part of the trail is fairly easy. The top part of the trail isn't as well groomed and can be icy even in June but the main part of the trail is hiked by parents with small children and people walking dogs regularly.. If you don't hike, bring a picnic lunch and enjoy some of the most gorgeous views in the Anchorage area. It's a 5 dollar parking fee, and you drive past the zoo on O'Malley, and keep driving until you start seeing signs pointing you towards Glen Alps/Flattop, then just follow the signs.

After you park, you'll see outhouses, a ranger station and a set of stairs. The stairs take you to the trailhead. Because of the grade, I wasn't able to do it yesterday, my knees were hurting a little too much from gardening. But the Turnip Girl and William enjoyed climbing up on a gorgeous day to a place there was still snow on the ground.
Click the images for larger views!
For me? Well, opposite the stairs, there is a shorter path that's a very easy grade and marked with a log fence. You walk up that path, and there is a spot with a bench. If no one else is sitting there, you can have your picnic there, looking over the whole city. Which was very, very hazy because of cottonwood trees and dust yesterday. Keep walking that path, and you find a big compass rose.

Around the compass rose are wood strips at irregular intervals.

Follow the strips and you find names of mountains, the distance to them, and their elevation. So working around the side that wasn't affected by the haze over Anchorage there was Wolverine Peak. 


O'Malley Peak


The Wedge


Ptarmigan Peak (Ptarmigan is our state bird!)

And Flattop!


And come fall, this is one of the best places to go blueberry picking. Yum!!

I hope you enjoyed this photo post. It was a really lovely outing with my family.

Wednesday, June 26, 2013

Book Review- Crochet One Skein Wonders


Crochet One-Skein Wonders fits in with this great series very well.

Edited by Judith Durant and Edie Eckman, it's a collection of projects by different designers that can be done with one skein of yarn or less. There are over 100 patterns in here, in sections divided by yarn types. The vast range of projects at several different skill levels ensures that there is something for everyone . If you are a beginning crocheter, this will be a book that can grow with your skills.

Because crochet uses so much yarn, most of the patterns are for accessories, with some housewares, toys and clothing to mix it up. The patterns are done in both American style written instructions and in international crochet notation. Each pattern starts by explaining what special stitches or techniques you might need to know so you'll know if it's going to be really easy for you make, challenging or "I'll get back to this project when I'm a lot better."

If you see a skein you want but have no idea what to do with it, this book has you covered. Super fine cotton threads, lace weight wools, bulky hand dyed wools and the weights in between.

My favorite projects are:
Susan Levin's Bangle Bracelets made with sock yarn.
Melody Fulone's V-stitched Elegant Fingerless Gloves
Sarah Grieve's Bellisfaire Beanie which is a lightweight hat perfect for fashion or cool spring or fall evenings.
Brenda K.B. Anderson's Maywood Purse is felted and embellished, and looks great.
Renee Rodgers' Handpainted Shoulder Bag uses an easy stitch technique and a bulky yarn for a quick to stitch purse that's simple, but still artistic looking.

There are actually a lot of patterns I like in here. Stuffed animals for everyone who likes them, hats, dresses and other things for babies and small children, a tea cozy and other housewares. If you love crocheting, this is full of one skein gift ideas.

The end of the book has an introduction to the designers, a good index, and illustrated crochet stitches for beginners. It also includes a chart of yarn weights and a glossary of crochet terms.

I do recommend this book, and plan to share it with my sister who just recently learned how to crochet.


I received a complimentary copy of this book to review, I received no other compensation, and my review is my honest opinion of the book. You can read more about my review policy here.

Monday, June 24, 2013

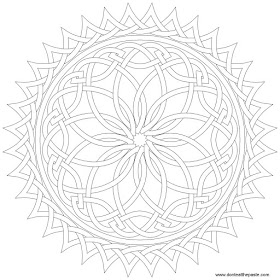
Sun knotwork to color or embroider

Sun Knotwork

It's been a while since I posted a new knot to color. I hope you enjoy this one! Inspired by the very pretty weather we've been having this summer.

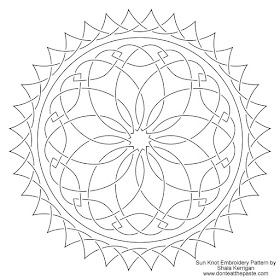
This one does come with a outline embroidery version. Click on the images for larger versions and print!

Small JPG version:
Sun shaped knotwork to color

Large transparent PNG version:
sun knotwork to color- transparent png version

Embroidery version! 100 ppi
Embroidery pattern- sun knotwork


Like these? You might really love my knotwork series of fabrics on Spoonflower.
Celtic Knot Fabric by Shala

Saturday, June 22, 2013

Book Review- Party Origami

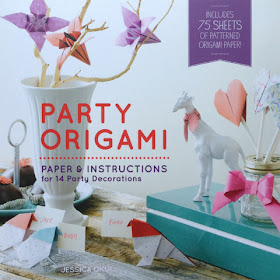
Party Origami by Jessica Okui


If you've been following my blog for long, you'll find out that I'm a big fan of Japanese crafts. I spend a fair amount of time on Japanese craft boards looking at all the fantastic eraser stamps, scrunchies (chou chou!) and amigurumi. For English sites, I like the Zakkalife blog, which is written by the author of this book.

Party Origami is one of the sweetest gift book sets I've seen. The envelope like folder holds a small origami book, and a tablet of patterned paper to use to make the projects.

So first, the paper- it's not quite square. I'm okay with that because I've had problems in the past accidentally ripping or creasing paper pulling it from a tablet. It will need to be squared to make the projects. The patterns are brightly colored and trendy. There are geometric prints, chevrons, little candy prints and floral prints. All in very pretty colors with solid color backs. The solid colors coordinate with the prints on front. Two sided paper is a lovely touch on origami. The paper is a thin kami type, which means it's very smooth and thin and creases very well.

The instructions in the booklet are for 14 projects that are mostly based on classic models. They are written in standard origami format. The introduction of the book includes full instructions for following the symbols used in standard origami diagrams. They are some of the best instructions I've seen.

I wanted to see what someone who didn't fold would think of the instructions. I let my son pick a model, he's been interested in learning origami. He's never done origami before, this is a new interest for him. He was able to fold the model he chose, then he picked a few others to fold.

I love the choices of models and how they are used. There are place card holders, napkin rings, buntings and coasters. Some great decorative models that are easy to fold and add a great touch. The place card with a favor pouch is one of my favorite projects, and I also really like the lantern bunting.

This set would make a nice gift for people who enjoy origami or want to learn more about it, teenagers, and crafters who entertain. Because of the use of traditional models, it's a great way to get started in origami, but more advanced folders may not find enough new in the set to enjoy it. I did enjoy it very much because the models are used in ways that are cute and stylish and the instructions are so clear. The trendy colors and patterns of the paper are a nice bonus.

I received a complimentary copy of this book to review, I received no other compensation, and my review is my honest opinion of the book. You can read more about my review policy here.


Friday, June 21, 2013

Cute Little Zip Case- hand sewing project


This little zipper case may seem a little complicated, but it's really, really not. Best part of it is that it's made from scraps and recycled materials, and it's good hand sewing practice. Unfortunately, I didn't take photos while making it because I made it a few months ago after getting proofs of some of my Spoonflower fabrics. I didn't really plan to post the project, but TG asked "Why not? It's cute!" This case is inspired by Japanese macaron purses, but instead of using a domed plastic shape for the sides, it uses milk jug plastic with felt to soften the top.

So you will need:

  • fabric- 4 pieces, they can be different patterns, but at least 6x6 inches if you are using a 7 inch zipper. 
  • zipper- this can be recycled if you pick out the stitches from the tape carefully and the tape is intact
  • clean empty plastic milk jug- I love milk jug plastic
  • ribbon- a 1/4- 3/8th inch satin ribbon is a good choice, just a few inches
  • needle
  • thread to match the zipper
  • a 6 inch piece of craft felt (if you are using a 7 inch zipper)
  • glue- tacky glue works well.
  • scissors- one pair for plastic, one pair to cut fabric. Please don't use your fabric scissors on plastic.
To start, overlap the ends of the closed zipper, and stitch them together. Stitch across the top bar of the zipper where it separates to close it securely at the top. Knot off thread on the right side of the zipper. It's going to get covered with ribbon so the knot doesn't show.


Make a small loop with part of the ribbon and sew it on so it goes the same direction as the zipper pull.

Now take another piece of ribbon and wrap the overlap with and sew it into place keeping the zipper flat. Don't let it gather or bunch up!

See how it's sewn? Also the open photo will hopefully help make the following instructions clearer.
So now that you've got your zipper loop, cut out 2 pieces of plastic in a circle that's about 1/2 inch smaller than the zipper loop. Which would be about a 1/4 inch all the way around.

Set the plastic pieces aside for a minute. Now it's time to gather up the zipper. Close to the edge, make basting stitches on one side and leave ends to pull. Repeat on the other side. Then pull to gather.
Now you'll make the inside. For that, cut 2 circles of fabric that are twice as big as the plastic. Stitch a running basting stitch all the way around, put the plastic in the middle on the wrong side of the fabric. Pull stitches tight around the plastic and knot off.
So now the insides are ready to be stitched to the inside of the case. Since the whole thing is going to be covered, you do want your stitches to be strong, but don't worry about how the knots look. Open the zipper, which should have a clamshell look with the gathering. Set one fabric covered plastic piece inside one side of the "clam shell" with the gathered sides together. Stitch it into place. Repeat on the other side.

Now it's time to make the top. For this side, you want it just the same size as the zipper loop. Cut 2 circles from the milk jug plastic the same size as the zipper loop, then 2 pieces of felt that are 1/4 inch bigger all the way around. Glue the felt to the plastic pieces. 
Cut 2 pieces of fabric in circles twice the diameter of the plastic circle. Do a basting stitch all the way around, then set the plastic circles on the wrong side of the fabric with the felt sandwiched between the fabric and plastic. Pull to gather the stitches. Knot securely.

Now all you have to do is stitch the outsides to the rest of the case, and it's done! 

These are so easy to make, and are super cute. Because the inside is very flat, it won't hold a lot of change, but it will hold a couple small treasures or keepsakes. 

Tuesday, June 18, 2013

Geometric mandala

Remember the black and white box I posted yesterday? As promised, here's the top of it as an 8x8 mandala you can color.

Click on the image for a larger version, print and color!

Small JPG version:
Geometric mandala to print and color- jpg
Large PNG version:
Geometric mandala to print and color- png
The weather here has been amazing. 70-80 degrees for a couple of weeks, and my garden needs regular watering. My rhubarb is doing really well.

If you're looking for organic seeds, I really like the seeds from GrowOrganic.com, almost all my annuals are from them, and my sugar snap peas keep impressing my husband as they climb the trellises. We plan to let some of the plants go to seed for next year. I hope you're enjoying your summer too!

Monday, June 17, 2013

Black and White Printable Box


I was going to print out an example on Astroparche, because this would look great on a colored cardstock, but the weather here is INCREDIBLE - so I'm just posting, then going out to enjoy the sun and my garden!
Yes, I will post the top later as a mandala. But right now, the sun is calling me!

Here you go! I hope you like this box, click the image for a larger version, print on card stock, cut out, score folds, fold, glue!

Friday, June 14, 2013

The Flag of the United States of America printable pages

flag of the United States of America


It's very rare that I do specifically educational printable pages. Most of my printables are meant for a wide range of ages.

This one is educational, and my terms of use are the same as usual. Yes, it's okay to use my printables with your scouting troops, classrooms, and other groups.

The first one is available in both large PNG format (not transparent, sorry!) and jpg format. The second one is only available in large PNG format because of the size of the fonts used.

The flag was drawn to exacting specifications to be as proportionally accurate as possible. The pages below are lined for text.

Click the images for a larger version.

Small JPG version:
United States of America flag paper- JPG

Large PNG version:


This one needs to be printed in landscape format. The flag is marked on every star in order of statehood with the abbreviation for the state name and the year it became a state. The text on the stripes lists the 13 colonies and the exact day they became states. Large PNG format.
USA flag with states listed printable


...And the winners of the Retro Owl Duck Tape rolls are..


The winners of my Birthday Retro Owl Duck Tape Giveway are-

John, Jennifer, Ranae, Sindy and Marji!

The Amazing Turnip Girl randomly drew the names this morning. Sorry I'm a day late announcing.

Thank you so much to everyone who entered!!

Wednesday, June 12, 2013

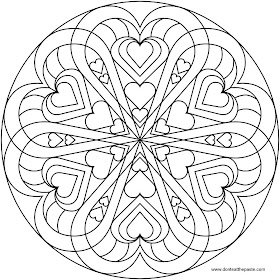
Heart Mandala to color

Heart mandala


Happy Loving Day! On June 12, 1967 in the Loving vs. Virginia case brought before the Supreme Court, Loving won. The decision made it clear that it's unconstitutional to deny people the right to marry based on race.
 "Under our Constitution, the freedom to marry, or not marry, a person of another race resides with the individual and cannot be infringed by the State".- Chief Justice Earl Warren  
I hope you enjoy today's mandala of hearts.
Click on the images for larger versions to color.

Small JPG version:
Heart mandala to color- jpg version

Large transparent PNG version:
heart mandala to color- PNG version


Tuesday, June 11, 2013

Product review- My Lanyard Maker


It's summer, which means it's time for summer fun things like camping, fishing, hiking, day camps, crafts and lanyard making!

My Lanyard Maker is a loom for lanyard making. It makes it very easy to knot flat plastic or round plastic lacing without that "I don't have enough hands" frustration. In my photo above, I have a basic box weave lanyard key ring, and the enclosed instructions cover two very basic weaves including the box weave.

The loom has 4 sides with 8 slots per side to arrange your lacing or cord in. Each of the slots is labeled with an embossed letter/number designation for following patterns. Just past one side is a clip so you can use it in a different layout for some designs. For weaves like the box weave, instead of the clip you would use the center piece which holds the key ring or small carabiner. The weave works up in the middle of the loom and you can drop out the center piece to continue weaving as it gets longer.

This also has a drawer to hold supplies, and it comes with some split ring key rings, plastic key rings, pony beads to decorate, and both round and flat lacing to get started. Like all of the line of products from this company, it's great crafting fun that is well thought out.

The products from the My Friendship line of products are well made, and well thought out, but hands down my favorite thing about the company is their interaction online. The webpage has several downloadable PDFs that are free which give instructions for many more projects to make with their makers, they post on their Facebook page- Choose Friendship, daily with quotes, happy thoughts and inspiration. 

You can find My Lanyard Maker at The Friendship Factory . 

The products reviewed in this post were provided to me at no cost for the purposes of review. I received no other compensation, and my review is my honest opinion of the product.You can read more about my review policy here.


Monday, June 10, 2013

Crochet Scale Pouch Pattern

Crochet Scale Pouch Pattern- with scales from The Ring Lord

I recently made another big order from The Ring Lord, and decided to splurge on some scales planning to use them in crochet. Haven't done that yet. These are small aluminum tags from The Ring Lord. They come about 500 to a bag which is enough to make 2 of these little pouches which would be excellent for a small amount of dice or as a little bag to tie to a belt to hold money at a Ren Faire. Look under Blanks and Tags.

You will need:

  • Size 10 crochet cotton
  • Size 5 crochet hook 
  • Scissors
  • Tapestry needle to weave in ends
  • 1 package of small aluminum tags from The Ring Lord- I used Frost
Start by stringing 225 tags on the thread. These are crocheted in as you go. If you don't want to count 225 tags, count 25, measure that, and string on a bit over 9 times that number in length. Because of the large hole in these tags (large by the standards of a beader who's done a lot of dental floss bead threading on crochet cottons) you can actually just put the tapestry needle on the thread and string them directly on. Unwind a bit of thread and push them down the crochet thread and rewind it on the ball.

Stitches-
dc= double crochet
sc=single crochet
tagged sc= single crochet with a tag
ch= chain 
sl st= slip stitch
st or sts= stitch or stitches
repeat ** around = Repeat what is between the asterisks until you get to the starting stitch of the round.

tagged sc= insert hook in stitch, yarn over, pull loop through stitch, leaving two loops on the hook. Slide tag up the thread to the stitch, yarn over, pull thread through both loops. 

Quick note on starting rounds- I don't like using chains to start single crochet rounds. They aren't the same size as a single crochet, and I prefer the look of a tight ch, then single crochet in that stitch. Generally it's not a big deal if you do it the way you are used to doing it for my patterns, but in this case, it's essential to do that way because the tags are set up to alternate columns which means some rounds start with a tagged single crochet. For starting dc rounds, I generally do 1 tight single crochet and 2 normal single crochets. If you prefer starting DC rounds differently, do them the way you prefer.

Base of pouch:

Round 1: Ch 4, 9 dc in starting ch, sl st to 4th ch to join. (10 dc)
Round 2: Ch 3(counts as first dc), dc in same stitch, 2 dc in each st around, sl st to 3rd ch to join. (20 dc)
Round 3: Ch 3(counts as first dc), 2 dc in next st, *1 dc in next st, 2 dc in next st* , repeat ** around, sl st in 3rd ch to join. (30 dc)
Round 4: Ch 3(counts as first dc), dc in next stitch, 2 dc in next stitch, *dc in next st, dc in next st, 2 dc in next st*, repeat ** around, sl st to 3rd ch to join. (40 stitches)
Round 5: Ch 3(counts as first dc), dc in next st, dc in next st, 2 dc in next st, *dc in next st, dc in next st, dc in next st, 2 dc in next st*, repeat ** around, sl st to 3rd ch to join (50 dc)

Scale part of the pouch:
The scales are offest by one column, and have one plain row between them. This diagram shows the placement as an example.

Round 6: Ch 1 (does not count as first st), sc in same stitch, sc in each stitch around, sl st to first st to join.
Round 7: Ch 1 (does not count as first st), sc in same stitch, tagged sc in next stitch, *sc in next st, tagged sc in next st*, repeat ** around, sl st to first stitch to join
Round 8: Repeat round 6.
Round 9: Ch 1 (does not count as first st), tagged sc in same stitch, sc in next stitch, *tagged sc in next st, sc in next st*, repeat ** around, sl st to first stitch to join. 

Repeat Rounds 6-9  3 times 
Round 17- repeat round 6
Round 18- repeat round 7
Round 19- repeat round 6

Scales done!

Top of pouch:
Round 20: ch 3, dc in each stitch around, sl st to 3rd ch to join. 
Rounds 21-24: repeat round 20
Round 25: ch 3, dc in next st, ch 3, skip 3 sts, *dc in next st, dc in next st, ch 3*, repeat ** around, sl st to 3rd ch to join.
Round 26: ch 1, sc in each st around, sl st to join.

Make 2 cords and weave them through row 25. You can either chain cords, use ribbons or make monk's cord. My example uses monk's cord. 

The technique is easy, and if you want a bigger pouch, just plan accordingly. So if you went with a base that was 80 stitches around, you would need 40 tags per scale row, and you'd want more rows of them probably. 

Oh, this has nothing to do with the crochet project, but The Ring Lord also has rings of course and kits! One of the things I ordered was the juggling ball kit for my son and he made this lovely set of juggling balls for Michael for Father's Day! The instructions are well written, and the project itself is no-sew.