Pages

Monday, April 29, 2013

Herbal Tea Cup Garden with Miracle-Gro

This is a Sponsored post written by me on behalf of Miracle-Gro for SocialSpark. All opinions are 100% mine.

Peppermint Tea Cup


The snow is almost completely gone, and it's starting to look like spring. Which actually means that all sorts of dead grass is showing and it's sunny enough that I'm craving green in my garden. 

A large tea cup gardening container is just perfect for an herbal tea inspired mini-garden. If you can't find one of those, you could also use a terracotta pot painted with the words "Tea Garden" or even painted to look like something out of Wonderland.

You will need:

  • Large container- I found the tea cup planter at a local store and just loved it
  • plants or seeds that can be made into herbal teas
  • Moisture Control Potting Mix - it's a great container mix that helps prevent over or underwatering
  • water

Suggested plants or seeds for herbal teas:

Suggest herbal teas

  • chamomile- this is easy to grow and makes nice daisy like flowers
  • peppermint (my choice!) is a classic favorite
  • strawberries- strawberry leaves can be steeped for tea either when very fresh (just picked) or absolutely dry. Do NOT steep partly dry. Plus strawberries are just good.
  • lavender is delicately floral, and can also be used for sachets or to flavor sugar
  • lemon verbena is bright, lemony and easy to grow

Direct seeding (sowing seeds directly into the soil) will work for lemon verbena, peppermint and lavendar. For strawberries and chamomile, I've had more luck with plants. If this is your very first garden, go ahead and start with plants. 

For direct seeding-

Fill your container to 1/2 inch to 1 inch below the top with Moisture Control Potting Mix, use your finger to make the holes to plant the seeds.  Read the seed packet for spacing instructions, but instead of thinking in rows, think of something like a star shape, with 1 seed in the center and then rays from that for the other seeds. Cover the seeds and water lightly. Give them sun, love, and water with LiquaFeed All Purpose Plant Food Advance Starter Kit. Make sure if you plant any kind of mint it's alone in it's container. Mint is very aggressive.

For plants-

Fill your container partway, leaving room for the plant. Take the plant carefully out of it's temporary container. Keep the temporary container, they work well for cuttings and sharing your plants with friends! To remove the plant, don't grab the plant itself and tug. Really, you don't want someone to lift you by the head right? Instead, tip it with one hand cupping around the plant and the other on the bottom of the container and gently shake it out of the container. Open up the roots a bit gently with your hands if necessary. Put the plant into the container and surround with soil going about a half inch over the soil line of the transplant. Water, feed, keep watered and in the sun. 

When the plants are established, you can pinch off leaves and flowers to make your summer teas. Peppermint is my favorite. You can pinch leaves off of it regularly and it grows really well. If you decide to transplant some in your yard, make sure you pick a place it can grow by itself and it will come back year after year with very little care.

All of these are also lovely iced, and can be used as ingredients in summer recipes.

Miracle-Gro has all sorts of resources for new gardeners and projects that are easy and fun.

There are a bunch of fun garden projects on Miracle Gro's Pinterest Page, I'm following it!  One of my favorites as a paper crafter is the Origami container project. You'll find tips, ideas, and great inspiration there. 

Miracle Gro's The Gro Project is letting people know that gardening doesn't have to be hard, that you can do some wonderful things with simple, uncomplicated ideas and plans. I know a few people who say they have a "black thumb" , I was one of those people for years. It's not really true. I've found simple projects with perennials that are hardy in Alaska was a good start, then started planning more annuals after getting more comfortable. Miracle Gro has a great librarey with tips for beginners and more advanced gardeners to help everyone's spring/summer get off to a green start. 

Visit Sponsor's Site

Book Review-Simply Precious Pop-Ups


I really love Japanese crafts and paper crafts a favorite of mine as well. Simply Precious Pop-Ups- Easy to make and Beautiful 3D Greeting Cards by Kiyoshi Kikuchi is a perfect fit.

This is an English translation of a book by Kiyoshi Kikuchi. He's written several books of kirigami projects that are only available in Japanese. Kirigami is cut paper art, it can be sculptural or flat. These cards are right in between. They are dimensional, but not quite sculpture. They are very clean looking and easy enough that if you couldn't do it in 5 minutes, you could certainly do it in 15 and have just the right card for any occasion.

The cards all follow the same basic steps. You fold the paper, cut out the lines to create a mirror symmetrical shape that is mountain folded in contrast to the valley fold that makes the cards. When the recipient opens the card, the mountain folded parts pop out.

The first few pages show the cards in color, with white paper for the pop up and the colored background for the outside of the card. Then you get into the patterns.

The patterns cover a wide range of interest, holidays and special occasions. Baby showers, weddings, new job, Father's Day, Mother's Day, Christmas and some cards that are just general occasion cards. Some are very Japanese in style such as the Emperor or the rice cake card.

After the photos are instructions for making the cards. Starting with a copy of the pattern from the book, it explains step by step with meticulous precision how to trim, fold and cut the designs. While the trimming is done with a craft knife, the designs are cut with scissors. Lots of photos show how to cut each card neatly. Then it explains how to glue it to the contrast paper.

Then the projects themselves all have their own pattern and folding instructions. All the folds are simple folds, but some of them are very tight, such as in the guitar design. However, most of them are easily done. At the very end are more patterns to cut out of a contrast paper to personalize your card a little more, those are shapes that look much like silhouettes.

I really like this book, it doesn't have sliders, spinners and other fancy effects like some pop-up books. Just very clean designs that are easily accomplished. You may need to practice a bit before trying some of the more intricate designs, but none of them are too intricate. They can be done with your children too as long your children are mature enough to use sharp scissors.

Published by Vertical Inc
.
I received a complimentary copy of this book to review, I received no other compensation, and my review is my honest opinion of the book. You can read more about my review policy here.

Friday, April 26, 2013

Printable dreams quote- Henry David Thoreau

Do not lose hold of your dreams- Thoreau quote

I haven't done a printable quote in at least a week right? Anyway, I hope you like this one.

Do not lose hold of your dreams or aspirations. For if you do, you may still exist but you have ceased to live. 
- Henry David Thoreau.
The image above is shareable from my Facebook page and click the image below for a larger version to print.
Henry David Thoreau printable  quote

Thursday, April 25, 2013

Printable Sun Box

Sun

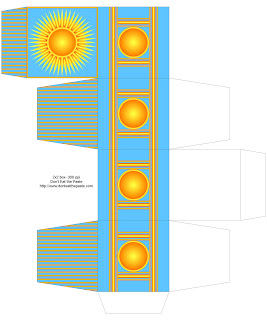
The sun is up for over 15 hours a day now up here but it's still not warm enough to plant seeds. I hope you enjoy this sun themed box! Click on the image for a larger version, print on card stock, cut out, score, fold, glue! At the top of my page is a tab for printing tips if you are having issues getting it to print the right size.

Printable gift box with a sun design

In other news! It's been a really good day other than the fact my friend Sam is still missing. 

This morning started with 2 really nice emails. One of them was for my original site, asking for permission to use my beading graph paper  for teaching purposes. The other was a fantastic thank you from a lady who uses my mandalas in all sorts of gift giving ways. 
Then the mail started coming. First up was Fed Ex with this!
owl duct tape Duck Tape

WOOHOO!! Here's a look at the label.

See that? Where it says By Shala Kerrigan?? Just wow. I'll be doing a giveaway soon on here!

Then the regular mail person came, and we talked about Pinterest for a few minutes. She delivered a big set of gel pens.  Then UPS came and there was a Dremel 4200 that I won in a contest. Just a banner mail day, both snail mail and email! 


Wednesday, April 24, 2013

Ducks, geese, and World Book Night (photo post)

Last night was World Book Night. The second annual one, and my family had a blast doing it last year so we signed up again this year.
It's a great project, and if you go to the site you can sign up for the newsletter and apply to be a book giver for 2014.
Even though we did it last year, my dad, once again didn't understand the concept. The stumbling block for him is the idea of me giving away books. He knows me too well. They aren't my books. They are published expressly for giving away, special editions, paid for by various publishers, printers and contributors. The authors give up their royalties for this special printing. You choose from a list of books which contains all sorts of things, classics like Mark Twain and current best sellers like Tina Fey's Bossypants. You pick 3 books, and agree to read the one you get if you haven't read it yet. The list has had books we've read before both times. Last year we choose Stephen King's The Stand, which my husband and I had read, but the kids hadn't. So they had to read it before giving it away. I bought them each a copy, and they knuckled down and both finished in time. This year, Rick Riordan's book The Lightning Thief was on the list. This is a book that TATG can give away very enthusiastically because he's her favorite author. To be fair, he was her favorite author BEFORE he put a photo of her on his website.(she's Anubis) But that just sealed the deal. So that was my first choice.
It was a drizzly, freezing rain, but that didn't deter anyone. We had so much fun doing it! If you do sign up for it, check out their resources. Sometimes it's very hard for some people to understand the idea of something for nothing. They think there has to be a string attached of some sort. If you're doing it with your family, practice conversation starters. Dress for the weather and pick a safe spot to give away books.

After we handed out books, we decided to go get something for dinner. On the way we spotted the surest possible sign of spring in Anchorage. All these photos can be clicked for more detail. I did not edit them other than cropping and resizing, so you can really get the effect of the drab, grey and brown mud. Ah SPRING!
Geese- Anchorage
Are they looking for spring?
Wanna see some ducks digging in the mud?
Not retouched. The legs are really that bright!


 I have another Kindle book out.
It's 5 cross stitch patterns for keys, and you can find it here

Tuesday, April 23, 2013

Book Review- Fabric Surface Design


I haven't done any silk or fabric painting in quite a few years and this book is so timely because I've been wanting to paint some silk shawls lately. Since it was never a subject that I knew much about, reading this has given me a lot more insight into techniques and tools.

It starts with an introduction to materials, the author talks about choosing the fabric paints, how they work and has a good chart to refer to how different paints can be used. She also discusses fabric types and how to choose and pre-treat your fabrics. The introduction to fabric surface design also explains the basic tools you'll need. How to make a good work surface and how to stretch fabric if it needs stretching.

Then it's into the techniques, and this is where this book shines for beginners or people like me who are getting back into fabric painting after years. She explains different methods in detail with clear photos and product suggestions and reviews.

You will learn how to:
painting fabric
using resists like wax or gutta
use salt in fabric painting for neat effects
how to paint things in ombre shades
2 methods for marbled effects
printing fabric using all sorts of methods
doing transfers
fake tie dye effects with a gorgeous watercolor look
Spot effects like using oil crayons and embroidery
foiling using a few methods
stenciling

Along with all of this are some great artist profiles and photos of finished pieces as examples. The book finishes with an explanation of color theory to help you with palettes.

She doesn't give you step by step projects, just all the information you'll need to create the fabric of your dreams. I was originally planning just to paint a couple of shawls, but after reading this, there are so many more ideas I want to try.

There is a good resources section at the back for finding the supplies she suggests using, a suggested reading list, and a good, complete index.

If this is a topic you have an interest in, I absolutely recommend it.

And yes, when I do paint those shawls, they will be posted here.


I received a complimentary copy of this book to review, I received no other compensation, and my review is my honest opinion of the book. You can read more about my review policy here.

Monday, April 22, 2013

Mother and child bird mandala to color AND a video

Bird Mandala


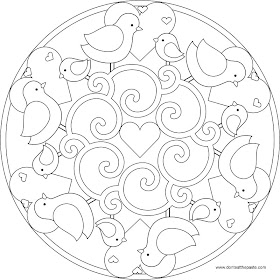
Hello! I hope you enjoy this mother and child bird mandala. It uses the same birds as this box.

Click on the image for a larger version, print and color or use for crafty things like embroidery or pyrography.

Small JPG version:
Bird mandala to color

Large Transparent PNG version:
Bird mandala to color or use for embroidery

In other news, I made a video of some of the mandalas from this site and posted it on YouTube. It's set to music written by my friend Auriplane (who also created the Snailiad game), it was a lot of fun to make it it, just a simple slide show. I plan to make more videos, and some will be how to vids. 


Saturday, April 20, 2013

Lots of great things this week, with one bad thing

Mostly, this week has been pretty amazing. One of my favorite craft sites asked if they could do a feature on some of my projects, I got to see a photo of my owl Duck Tape, 1000 people liked my Facebook page (which I didn't notice until just now) those are the big highlights. A lot of little things. Michael and I discussed cultivating mushrooms this summer and we had a lovely night out looking at stars and kissing like teenagers while parked out at Beluga Point.

It's been mostly just wonderful, except for one great big thing hanging over it all. One of my oldest and dearest friends is missing.

So, I have a favor to ask of you. If you can send a good thought or prayer, that would be wonderful. It would also be great if you could share his missing poster on FB if you live in the Northwest American states or if you have friends who live in Alaska or live in Alaska yourself.

You can find it here.

I met Sam when he was about 14, and I was about 18. That kind of age difference as a teenager can prevent a friendship, but we connected. Deeply and strongly. Sometimes I have to concentrate really hard to remember we aren't still both kids still when we are together. But we aren't, and he's become this amazing man. He's an engineering student who wants to build things like wildlife bridges to help animals and people occupy the same space. At least, some of the time he wants to do that, he also thinks teaching would be a good thing too, and actively works as a tutor helping lots of Alaskan students with math and engineering. He's really good at explaining things in a different way so that people can grasp fundamentals, and he loves seeing them get enthused over having the tools to create their dreams.

He's interested in everything, philosophy, science, math, he reads science fiction and fantasy and we recommend books and music to each other. He's a big fan of Marian Call who is also one of my favorite artists.

But the thing that makes Sam really special is more subtle than all that. It's the fact that he's not halfway about anything. If you're his friend, he shows that kind of interest in your life, he makes people feel like they matter. Or at least has always done that for me. When my best friend died, he was one of the people who really helped me through the initial grief.

He is listed on national registries as missing, and there is a case open with the Anchorage Police Department as well. It's been over a month since anyone has seen him.

Thank you.

Thursday, April 18, 2013

My new favorite way to eat asparagus!

Lemon and French Grey Salt asparagus

This was going to be a post about fish. It was supposed to be about fish when I plated dinner last night and grabbed my camera. But then I started eating. The fish, Alaskan cod, was very good. The asparagus? OH MY STARS! The only way I'd like it better is if we had done it outside over a birch wood fire.

It was just that good. It's not that I did much different, so it has to be the salt.

I love good salts. If you think salt is salt, then you might be missing out. A lot of the gourmet salts have minerals in them. Just like water from a mineral spring tastes a lot better than flat, completely pure water, salt that has minerals in it tastes better than regular salt, or even then standard sea salt. Some of them are smoked for even more flavors.

San Francisco Salt Company sent me some of their gourmet salts to review. I'm a nut for gourmet salts, and my husband enjoys them too. This 3 pack is available on Amazon, or you can order salt directly from their site. These are the 4 ounce shaker style bottles. The bottles are attractive, glass with what looks like brushed aluminum tops which cover the plastic shaker top, which means they are great bottles for reusing if you buy bulk salt to refill them.
The salts themselves are a good range for a beginner into the world of gourmet salts. Himalayan Pink is the one with the strongest flavor, it's a bit lower in sodium than most salts, and has a great mineral taste. It's my personal favorite for chicken and salmon. It's also wonderful on vegetables. French Grey Sea Salt is my husband's favorite. The flavor is more delicate, and should be paired with mild flavors to really enjoy the depth it offers. It has a moist appearance because it is a bit moister than other salts. It's not wet, and it doesn't cake. It does pour freely from the shaker top. Pacific sea salt is the closest to normal table salt, it still has some flavor, but it's very subtle. These shakers are fine ground and work for all the applications regular table salt works well for. Except it really makes things taste better.
They also have coarse salt, and included a sample of the French Grey Salt in the coarse texture. Coarse salt is the kind you want to use as both a flavor enhancer and as a gorgeous finishing accent. It's great for chocolates and all that kind of stuff too. Just a few pieces on top of a truffle to bring out the flavors? Divine.

Oh.. sorry. This was about asparagus. I really, really like salt.

So a lot of Alaskan fisherman and women have a standard recipe for Alaskan fish. It generally starts out
Ingredients:
1/2 cup or 1 cube of butter

After that, various recipes change. Some call for seasoning salt, some for garlic or a whole onion or all three of the above. Some call for lemon juice. End result is that if you have a mild fish like Alaskan cod or halibut, you stop tasting the fish and taste mostly the seasoning and butter. It does taste good, but it seems a waste to mask the flavor of good, fresh fish.

So what I did was simplify it a bit.
1 lb Alaskan cod fillets (pat dry with a paper towel)
2 Tbs. butter
2 Tbs olive oil
1 onion, chopped fine
zest of one lemon
French Grey Salt (to taste)
black pepper (to taste)
Pepper sauce or hot sauce if you're a fan

Heat the butter and olive oil in a large skillet over medium heat until the butter is melted, add the onions and cook until just soft. Move the onions to one side. Put in the cod fillets and season with salt, pepper and the lemon zest, cook until brown on one side, flip over and cover with onions. Cook until done. Which is when the fish is opaque and flaky. When you serve it, you'll slide a spatula under the fish and flip it on to the plate so it's served on top of the onions, then use 1/2 of the lemon to add lemon juice over the top of the fillets.

So, that's that, and that was good.

Then I did the asparagus.
Starting with frozen asparagus - Why frozen? Frozen asparagus is really fresh, and unless you have it in your garden, the stuff from the grocery store has been aging and dropping in flavor and tenderness since it was picked. Frozen asparagus is blanched and then frozen fast at the peak of it's season. It doesn't have "woody" bits, and it's got great flavor.

1 bag frozen asparagus spears
2 Tbs butter
the other half of the lemon
French Grey Salt - coarse

Melt the butter, and add the asparagus. Cook until it's heated through, then squeeze the lemon juice on top of it. Plate, and top with a sprinkle of the salt.

It's really that simple, and tasted so good that my DAUGHTER ate some, and she generally hates cooked vegetables and really detests asparagus. The rest of my family enjoyed it very much. This is my favorite way to eat asparagus now. At least until my husband can do roughly the same thing on the grill adding in that wood smoke flavor for absolute perfection.

Check out the San Francisco Salt Company on Facebook, they are currently running a giveaway and the winner gets 100 dollars worth of salt.

Wednesday, April 17, 2013

Spiral Mandala to color

Spiral Dot Mandala

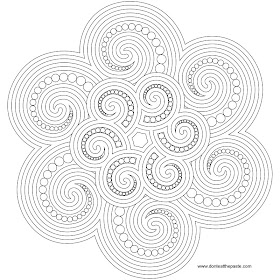
I hope you enjoy this new mandala to color! Click on the images for larger versions, print and color.

Small JPG version:

Mandala to color

Large transparent PNG version:
Spiral mandala to color

This is the 1000th post on Don't Eat the Paste, and I just passed 1000 reviews on Amazon.com, as well as hitting that 3 million pageviews marker. It's kind of been a big couple of weeks!

When I started drawing mandalas for this site, it was supposed to be one off thing, or an occasional thing. But it got to be very relaxing to draw them and the reception they got from all of you was just fantastic and encouraging. So I kept drawing mandalas for people to color in. A few have been licensed for other material, and they are being used by therapists, educators, libraries and even a couple museums. My readers have sent me scans of the ones they've colored in and I'm pretty sure a very nice guy in Canada named Samuel is the biggest fan of my mandalas. So when I was deciding "What should my 1000th post be?" it seemed like a mandala was the right choice. The most popular printable box on this site is one with spirals and dots, so that's why this is a spiraled dotted mandala. 

Thank you, Liberty, Samuel, lemondedis, Tana (working on those tags for you!), Kai, freebird7100, MJ, OMazingKids and a whole bunch of other people that I'm forgetting for the constant support and kind comments. Of course a big special thank you to Rachel of OnePrettyThing, and to everyone who pins, stumbles, shares and tweets. 

Thank you for making my little spot on the internet so much than I ever expected it would be. Here's to the next 1000 posts! Hopefully you all enjoy them.


Saturday, April 13, 2013

Little Bird Circle Tags

little bird circle tags to print

A few people told me they really loved the little birds box last week. When I drew the birds I was thinking they might be cute in a few things including circle tags. I love circle tags. One of my favorite uses for them is using them on printable iron-on fabric to use as patches. They can also be used as gift tags, or glued to cut down skewers or long toothpicks as cupcake toppers, or printed on paper and used with spray adhesive as decals for scrapbooking. I hope you like this little circle tag!
Click on the image for a large version to print. Print on whatever medium works for your purposes.

This is an example of another circle tag that I made and turned into a patch using iron on fabric. The edges did start to peel up after a year of constant use. My son carries the bag daily and opens and closes it a few times a day. So if it's going through that kind of use, stitch the edges!


The first link is the circle punch I use. It's got some negative reviews so be sure to read the reviews! My own experience is that I've had to replace mine once in 4 years, and it got misaligned/broken because of improper use by a family member (it was upside down, trying to go through chipboard. He bought me a new one). I've used it on aluminum cans, card stock, and paper. It doesn't handle very thin paper well but does great on the printable fabric!
The second link is the printable fabric used for that patch.

Snow, slush, smells like spring cleaning time! Dollar General

This post brought to you by Dollar General. All opinions are 100% mine.

Spring, if you live here, means slush. It means things tracked in as the weather warms and you need to start cleaning.

It means that ice is melting, and mold is forming. I like spring, I really do. I like the potential of it. The cleaning part is... a lot less fun.

So to start- 

Organize craft materials and repair the damage to my pantry after a winter of "It's too cold to go to the store, what do I have on hand?" It's also time to clean out the freezer and try to figure out why half my date labels smudged (permanent markers aren't) and try to remember "When did I get this?" Also it's time for me to draft my kids into a lot of the cleaning. Taking woolen jackets to the cleaners before packing them away for summer and making sure all the hats are clean and put away too. 

It's also frequently time for me to pick up a book and think "I'll do the rest later." then feeling guilty and putting down the book to start organizing and cleaning again.

You can get all sorts of spring cleaning supplies at Dollar General and enter a sweepstakes with great prizes, there are 4 Grand Prizes of new household appliances, plus a lot of Dollar General gift cards in an instant win game. Check the official rules, there are some states excluded.

So what kinds of things need cleaning after a long winter?

 Tilex® Mold & Mildew Remover - Kills 99.9% of household mold & mildew. Eliminates stains before your eyes. Delivers a powerful clean without scrubbing. Contains Clorox® Bleach 

Snow and damp in my arctic entry mean MOLD. I'm allergic *sneeze*. This makes quick work of most of the area.


Clorox® Bleach Foamer for the Bathroom clings to your bathroom surfaces and begins working right away.

Oh yes, Make sure the master bathroom is super clean for hot baths after untangling yarn that shouldn't get that tangled when it was placed neatly into bins. 

Okay, back to cleaning now. Then after all that is done, and the snow is all melted, it will be time to face my lawn. Good luck everyone! With the right tools, it's doable and then we can really enjoy the best part of spring and summer!

Visit Sponsor's Site

Friday, April 12, 2013

Printable Quote- I know I can achieve it

Achieve quote
“If my mind can conceive it, and my heart can believe it, I know I can achieve it.”
 Jesse Jackson
This quote should be printed to fit a sheet of paper and will print at 8x10 inches for framing.  The above version is shareable from my Facebook page. The version below is to print. Because it's black and white it looks fantastic on Astrobrights paper! Click the image for a larger version.


Thursday, April 11, 2013

Duck Tape® Prom Queen (Mini Crown Tutorial)

This is a Sponsored post written by me on behalf of Duck® Brand for SocialSpark. All opinions are 100% mine.
Duck Tape® Mini Crown
I remember when my daughter was little and she discovered Duck Tape®. She created clothes for her fashion dolls and stuffed animals, purses, bags and covered notebooks. She's still making purses, accessories and notebooks even though she's (mostly) outgrown fashion dolls.
Duck Tape® has an annual scholarship fashion contest for with great prizes for people who attending their proms. Stuck at Prom® is open to students from U.S.A. and Canada except for Maryland, Vermont, Colorado, Puerto Rico and the Province of Quebec. You need to be at least 14 to enter and going to an school sanctioned prom of some sort. You can find the full rules HERE and an f.a.q. HERE. Check out the gallery of previous winners and entries!
I was talking to a reporter about Duck Tape® after winning the contest, and he was surprised to find out that there were patterns for Duck Tape®. I'm sure he would be really astounded to know just how many. Like Duck Tape® on Facebook (I do!) , right now the cover image is a whole bunch of different designs and colors of tape. The Duck Tape community on there is helpful and supportive.
Duck Tape Patterns
Here are just a few patterns and colors just to give you some idea what's available.
The metallic  Duck Tape®  that I used for the base is also available in silver.
To make a mini crown you will need:
Duck Tape®
Non stitck scissors- These things are the best thing in the world for Duck Tape® crafting! I like Westcott Titanium Coated Scissors
my pattern for a crown
ball point pen or permanent marker
elastic- cord or narrow elastic
bobby pins
optional- parchment paper (a tip that I got from Cathy who designs applique bags and purses, look for DuckTapeVillage on FB)

The basis for almost all Duck Tape® crafting is making a sheet, and you can find instructions on their site for doing that. You'll start by making a sheet big enough to fit the crown pattern. Click the pattern for a larger version, print and cut out.
Duck Tape® Crown Pattern
After you make the sheet and check it on your crown pattern- outline the pattern with the pen.


Cut out the crown. Tape it closed. You don't actually need the tab, but it does make it a little easier. One of the nice things about Duck Tape® is that seam allowances aren't necessary! You can just butt edges and tape them.
After you cut out and assemble the crown, you can tape over the edges to make sure they are all covered, or use a marker on them or just leave them plain. I taped over them.

Tape a  piece of elastic inside the crown across the diameter at the bottom . This provides a base to clip it into your hair.  You could also do an X in elastic if you want to pin in down in your hair with more security.
Then the fun part, decorate it. There are all sorts of tapes, all sorts of ideas. This is where the parchment paper can come in handy. If you lightly adhere tape to the slick side of parchment paper, you can cut out appliques and motifs from tape to decorate your crowns and other items more easily.
Even if you aren't the official Prom King or Queen, you'll have your very own crown from your prom.
Go get Stuck at Prom®
Visit Sponsor's Site

3 Million Pageviews and other things I like this week

Sometime while I was sleeping, Don't Eat the Paste went over 3,000,000 pageviews. I'm insanely happy about it and trying to figure out some really good way to celebrate. Thank you so much, to the people who comment regularly, email me, pin images from this page, and follow on Facebook. Your encouragement and support means just the world. Thank you.

My Facebook page is also very, very close to 1000 likes now!

Now it seems a bit anti-climatic, but there were a few other things that I've been meaning to post about because they make me super happy.

1. This one may seem strange to you, G7 Power LED light bulbs! As some of you know, I'm a top reviewer on Amazon.com, which means that sometimes companies email me asking if I'd be willing to review products. Making the switch to LED bulbs is something that my husband and I have talked about often but the brands we tried didn't suit our lighting needs. They were dim, or had a directional spotlight effect. So when I got the email from G7 Power, I was skeptical but hopeful. Generally companies don't ask for reviews until they are very confident.
They are fantastic. The light is a soft white, and bright enough with a good flood instead of a spotlight effect. The standard type of bulbs are very bright, and need to be some place that has a shade of some sort. I have one of the globe bulbs in my ceiling fan fixture and it's lighting up my living room. They do cost a bit more initially, but they have a very low power draw (10 watts for a 60 watt equivalent bulb) and are made from a shatterproof plastic that really looks like glass. They last an incredibly long time and even come with a lifetime guarantee. I told my son he will inherit those light bulbs as a joke, but it's actually a possibility.

The colored rings are very stretchy which makes this claspless!
3. The Ring Lord pre-cut rings- not an affiliate link, but if anyone wanted to get me a gift certificate I'd be all sorts of happy. I ordered from them because my son and husband want to learn to knit chainmail. They haven't started yet, but I've made 3 bracelets so far. I've been considering posting a tutorial if anyone is interested.
Made of bronze rings. This is a nice sized cuff.


Wednesday, April 10, 2013

Little Birds Printable Box

Little Birds Printable Box Thumbnail

I hope you like this little birds printable box with a parent and child as much as I do. I think it would be cute for Mother's Day presents!

Click on the image for a larger version to print, print on cardstock, cut out, score all folds, fold, glue. Check out the printing tips in the tabs if you are having issues with my boxes printing too big. You might find a tip that will help.

Printable bird themed gift box

Tuesday, April 9, 2013

Crochet Blocks Ribbon Pattern

Crochet Blocks Ribbon Pattern

This ribbon pattern is so easy to make, it just uses chains and single crochets to create nice neat rows of diagonally set blocks. I used the ribbons to make bracelets by stitching snaps on the ends.

American terminology
ch=chain
sc= single crochet

Worst weighted yarn version:
You will need:

  • worsted weight yarn
  • size G (4.25mm) hook
  • yarn needle
  • scissors
Chain 5

Row 1: Sc in second ch from hook, sc in each ch (4 sc)
Row 2: ch 1 to turn (does not count as first sc), sc in each st across
Row 3: Repeat row 2
Row 4: ch 1 to turn (does not count as first sc), sc in each st across, ch 3 (first block made)

Row 5: Sc in second ch from hook, sc in next ch, sc in next 2 stitches (4 sc)

Row 6: ch 1 to turn (does not count as first sc), sc in each st across
Row 7: Repeat row 2
Row 8: ch 1 to turn (does not count as first sc), sc in each st across, ch 3 (block made)

Repeat rows 5-8 for as long as you want the strip to be, on the last block, skip the ending chain 3, and break off yarn to weave in ends.

Size 10 thread version:
You will need:

  • Size 10 thread
  • Size 5 steel hook (1.7mm)
  • Chenille or ribbon needle to weave in ends
  • scissors
Chain 7
Row 1: Sc in second ch from hook, sc in each ch (6 sc)
Row 2: ch 1 to turn (does not count as first sc), sc in each st across
Row 3-5: Repeat row 2
Row 6: ch 1 to turn (does not count as first sc), sc in each st across, ch 4 (first block made)


Row 7: Sc in second ch from hook, sc in next 2 ch, sc in next 3 stitches (6 sc)

Row 8: ch 1 to turn (does not count as first sc), sc in each st across
Row 9-11: Repeat row 2
Row 12: ch 1 to turn (does not count as first sc), sc in each st across, ch 4 (block made)

Repeat rows 7-12 for as long as you want the strip to be, on the last block, skip the ending chain 4 and break off thread to weave in ends.

To make bracelets-
you will also need sewing thread, hand sewing needle and sew on snaps.
Make strips long enough to wrap around you wrist and overlap one block. For the worsted weight, that wound up being 8 blocks, for the thread it was 10 blocks.
Stitch the snaps on each end of the bracelet, with one side of the snap in the middle of one block on one end, then flip the ribbon over and sew the other side of the snap in the middle of the block on the other end.

You could stitch the edges together offset by 2 and 3 respectively to make a bangle but the blocks will stretch more that way. Snaps seemed a good option for keeping the shaping without having to reblock every time I wore the bracelet!

For the worsted weight, I used a stash yarn in cotton. For the thread version, I used Aunt Lydia's crochet cotton in Aspen. I love how the colorway created pretty striping on the finished project.


Sunday, April 7, 2013

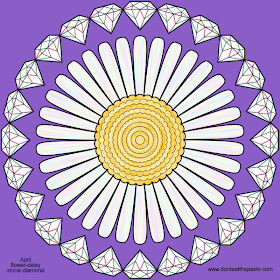
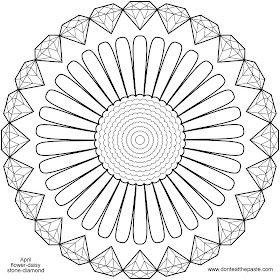
April Birthstone and Flower Mandala

April Mandala- Daisy and Diamonds

Happy Birthday to everyone born in April! I'm sorry this is so late.

April's birth month flower is the Daisy! Specifically the common lawn or field daisy which generally have 34 petals which is a Fibonacci number. Daisies are one of the flowers that really follow Fibonacci sequences, up here it's mostly Shasta daisies which have 21 petals. 1-1-2-3-5-8-13-21-34...

Paired with this common flower is one of the most coveted gemstones. April's birthstone is diamond. If it seems boring to just leave the stones white, remember that white light has all the colors in it, and diamonds refract that light reflecting off the surfaces.

The Birthstone and Flower series of Mandalas

Click the images for larger versions to color.

Small JPG version:
Daisy and diamonds mandala to color

Large transparent PNG version:
Daisy and diamonds mandala to color- large transparent PNG version