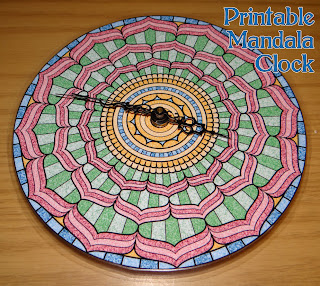
Like the comic book clock, I did this one using lamination, but you don't have to. The project will work just fine using cereal box weight cardboard, heavy printer paper or cardstock and ModPodge. I have a laminator though and enjoy using it.
For this one, you'll need to print a mandala. This is the colored version I used. Click on the image for a larger version.
Or you can print and color your own version of this mandala HERE.
This mandala was designed to be used as a clock dial. The divisions are by 12 and 60 for hours and minutes. Any mandala will work, but I do recommend one with 4 sections of radial symmetry or with 12 sections of radial symmetry to make it easier to tell time.
You will need:
Scissors
Clock movement
Clock hands
mandala
For the ModPodge- you'll need Mod Podge and a second piece of card stock or other lightweight cardboard
For the laminated- you'll need a thermal laminator and a letter sized lamination pouch
For a cardboard/card stock lamination, you'll take one colored mandala (either your own coloring or the version above) and cut it out around the mandala then cut out the second circle. Trace that mandala and the center circle on a piece of card stock or cereal box cardboard, and then trace the inside of the larger hex nut in your clock movement kit in the center of the small circle. Cut it out just outside the tracing and check it on your clock movement to make sure it fits. Trim only a little off at a time until it does fit. Then use a black permanent marker to color the center of the backing. Spread the back of the mandala with Mod Podge and glue it carefully into place on the backing piece, then cover the surface with more ModPodge. Let dry. Follow kit instructions to install clock movement.
For a laminated version, you'll follow the same steps as the comic book clock basically.
Print the mandala, color it if you chose the blank version.
Cut out the center circle and cut out the mandala so it's round.
Laminate using a letter sized 3 mil or 5 mil pouch
Trace the inner circle of the large hex nut using a permanent marker
Cut out, check on movement shaft, trim to fit
Cut out carefully around the mandala leaving a small laminated edge all the way around.
Follow kit instructions to install clock movement.
So why is this so addictive? Because it's easy and because I really, really love clocks. How easy?
The back of the movement has a hanger on it, which is perfect for the paper clocks.


No comments:
Post a Comment
Thank you for leaving a comment! Because of the high spam levels and still wanting the site to be friendly, I switched to moderating comments instead of a captcha. As long as you aren't a spammer or spambot this comment will show soon!