Printing Tips

Check out my printing tips if you're having problems printing to the right size
If you'd like to support this site and all the free things I post- please check out my Don't Eat the Paste Mandala collection coloring book for 9.99 at Amazon.

Sunday, March 31, 2013

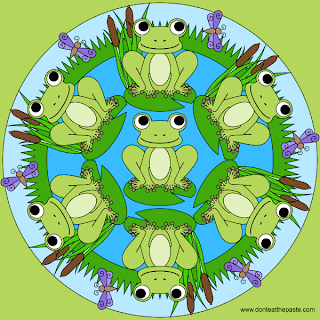
Frog Mandala to color

Frog mandala

It's nearly April. My seeds are here, and I'm going to be starting them for when the ground thaws tomorrow. In the spirit of spring, I hope you enjoy this printable frog mandala. Click on the image for a larger version, print and color!

Small JPG version:
Frog mandala to color

Large PNG version:
Frog mandala to color


Friday, March 29, 2013

2 Printable Basketball Inspired Boxes

Title- 2 printable basketball boxes

My husband, kids and I aren't really into sports. That's not why this is so much later than I planned originally, but it might be a contributing factor.

My dad on the other hand, like millions of other Americans, has spent most of the last few weeks glued to his television set. I think his gaming consoles are actually getting dusty. Because it's that time of the year.

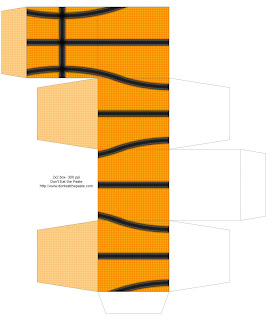
I hope you enjoy this simple set of gift boxes. One is a 2x2x2 inch cube, the other is 3x3x1 inch. Click on the image for a larger version, print on card stock, cut out, score folds, fold, glue.

Printable Basketball themed gift box

Printable basketball themed gift box


Wednesday, March 27, 2013

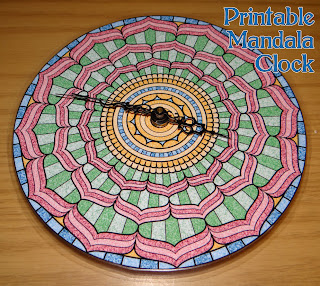
Printable Mandala Clock

Printable Mandala Clock Project

I bought 5 clock movements from Klockit when I ordered the movements. Originally the plan was to make a mandala clock, but then the other clock projects happened first. I also should have ordered more movements because this is fun and I love clocks that tick.

Like the comic book clock, I did this one using lamination, but you don't have to. The project will work just fine using cereal box weight cardboard, heavy printer paper or cardstock and ModPodge. I have a laminator though and enjoy using it.

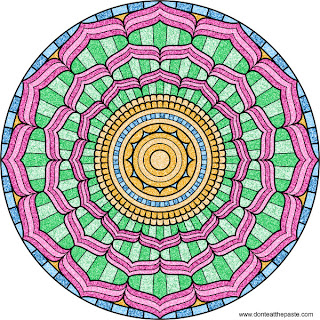
For this one, you'll need to print a mandala. This is the colored version I used. Click on the image for a larger version.

Or you can print and color your own version of this mandala HERE

This mandala was designed to be used as a clock dial. The divisions are by 12 and 60 for hours and minutes. Any mandala will work, but I do recommend one with 4 sections of radial symmetry or with 12 sections of radial symmetry to make it easier to tell time. 

You will need:
Scissors
Clock movement
Clock hands
mandala

For the ModPodge- you'll need Mod Podge and a second piece of card stock or other lightweight cardboard

For the laminated- you'll need a thermal laminator and a letter sized lamination pouch

For a cardboard/card stock lamination, you'll take one colored mandala (either your own coloring or the version above) and cut it out around the mandala then cut out the second circle. Trace that mandala and the center circle on a piece of card stock or cereal box cardboard, and then trace the inside of the larger hex nut in your clock movement kit in the center of the small circle. Cut it out just outside the tracing and check it on your clock movement to make sure it fits. Trim only a little off at a time until it does fit. Then use a black permanent marker to color the center of the backing. Spread the back of the mandala with Mod Podge and glue it carefully into place on the backing piece, then cover the surface with more ModPodge. Let dry. Follow kit instructions to install clock movement.

For a laminated version, you'll follow the same steps as the comic book clock basically.
Print the mandala, color it if you chose the blank version.
Cut out the center circle and cut out the mandala so it's round.
Laminate using a letter sized 3 mil or 5 mil pouch
Trace the inner circle of the large hex nut using a permanent marker
Cut out, check on movement shaft, trim to fit
Cut out carefully around the mandala leaving a small laminated edge all the way around.
Follow kit instructions to install clock movement.

So why is this so addictive? Because it's easy and because I really, really love clocks. How easy?


These are the pieces from the Klockit clock movement kit and the instructions. It's only a few pieces. I used the #10043, which is a quartz battery operated clock movement that uses a standard double A battery and has a very short shaft which is perfect for paper clock projects. It has maximum dial thickness of 1/8th inch. Most craft store movements are designed for thicker dials. The only tricky part of installing the movement is getting the hands set just right. For that reason, I don't recommend the hands I used above for absolute beginners. The delicate scrollwork is a little too easy to bend. The spade shaped hands are really easy to set though and have a classic look to them! The rubber ring goes between the movement and the face and holds the face in place fairly well once you screw down the large hex nut. After the large hex nut, you set the hour and minute hands. The holes on them are shaped specifically to fit in different places on the movement so it's really hard to make a mistake except when you are setting both hands to the right positions. You can't accidentally push the minute hand down to where the hour hand supposed to be, and they are spaced so as long as the hands are straight, they won't lock up together going around the clock. Then you will either put on the final closed nut, or if you're using a second hand, a small open nut, then the second hand. Then it's done. Set it to the right time, put a battery in it, and tick tick tick! You can also order movements for other dial thicknesses, so if you have a clock that has a lot of sentimental value but no working movement, you can replace the movement yourself.

The back of the movement has a hanger on it, which is perfect for the paper clocks.

Tuesday, March 26, 2013

Cookie and Milk Chocolate Candies

Cookies and Milk Chocolate Candies

Aren't those pretty with their strata of cookie crumbs? The Amazing Turnip Girl made them for her grandfather keeping in mind his tastes the entire time. Dad's a chocolate with more chocolate sort of person, so these were perfect. He also prefers milk chocolate to dark chocolate, so these instructions use that. You can absolutely use dark chocolate.

You will need:

  • 7-8 ounces of good quality chocolate*
  • 8-10 Oreos- crushed
  • Coconut oil
You will also need:
  • Double boiler or a heat-proof bowl (I use a glass mixing bowl) and a sauce pan
  • spoons!
  • knife
  • silicone candy mold
  • cookie sheet
  • wax paper
*I've said this before- but good chocolate is one that's only a few ingredients. If you see a bunch of kinds of oils, or see any chemical names other than lecithin- put it down and pick a different chocolate. I don't know how those types of chocolate, or chocolate candy will work in my recipes. We used Godiva because it was on sale and I know my Dad likes Godiva chocolate. 

You can crush the Oreos in a food processor, in a heavy duty zipper type freezer bag or just using a spoon and some muscle in a good mixing bowl. The second 2 methods are fun for kids. 

Put 2 inches of water in the bottom pan of the double boiler or your improvised version of one, and then set the top or bowl on top of it. Cut chocolate bars into small chunks using a sharp knife. Bring water to a simmer over low heat, and add chocolate and 1 tsp. of coconut oil to the top bowl. Melt chocolate. As it starts to melt, stir it to incorporate unmelted pieces and just keep stirring, it melts pretty quickly. Using the coconut oil makes for shiny chocolates without having to temper the chocolate (which is another skill set and a bit more work with more tools) but the chocolate WILL have to be kept chilled because it hasn't been properly tempered and milk chocolate likes to melt.

Get your clean and completely dry mold set on a wax paper lined cookie sheet. This helps keep any accidents off your counter tops! 

Spoon a small amount of chocolate into each mold, and then a small amount of cookie crumbs using separate spoons, after you've done that in the mold cavities, fill each cavity with more chocolate.  

Then you just set it in the freezer or fridge to chill until hardened, and unmold the chocolates. The reason I like silicone molds is that you can pop them out from the bottom by pushing up on the bottom of the mold and they come unmolded beautifully. If you want to, you can put them in candy papers or mini-cupcake papers, and chill until you're ready to serve them or give them as a gift.

The flavor is wonderful, since they used a good chocolate as a base and the cookies add a nice crunch. Her Grandpa will probably love them since they combine 2 of his favorite things. Chocolate candy and chocolate cookies. You can use different cookies in them if you prefer. Ginger, vanilla, even graham crackers.

T

Monday, March 25, 2013

Lotus Mandala to color

Mandala

This lotus petaled mandala is kind of special. It's designed to color of course, but if you'll look at the careful divisions, it will also serve as a clock face. The little section that's blue in the center of my digitally colored example is divided into 60 sections for minutes or seconds. It's a 12 petaled design for the hours and the outer ring is also divided into 60 sections.

So later, I'll be posting the full sized version of the one above instead of the smaller version I used for this, and a photo of the finished super simple clock. It will be made using the same basic technique as my comic book cover clock.  So if you decide you want to make a clock using this design, you can use my colored version, or color in your own.
Click on the images for larger versions to print and color.

Small JPG version-
Large transparent PNG version-


Thursday, March 21, 2013

Cadbury Creme Egg Printable Box Set

Printable box for Cadbury Creme Eggs
I haven't made a creme egg box yet this year! I hope you enjoy this one. Click the images for larger versions, print at 8x10 inches on card stock. Cut out, score all folds. Glue side seams, then glue the bottom tabs of the egg boxes (seriously! those eggs are a bit heavy), fold top lip of base box over and glue to the inside to reinforce. Fill egg boxes and put them in the "basket". You can find more complete instructions and another creme egg box here. Print 2 of the egg box pages, and one of the base box pages.

You can buy the blank template in PNG, JPG or PDF format from my Etsy store (emailed) or in PDF format from Craftsy (instant download on Craftsy!)


Tuesday, March 19, 2013

Book Review- Knitted Letters

Knitted Letters- Make Personalized Gifts and Accents with Creative Typography-Based Projects by Catherine Hirst and Erssie Major is a knitting book full of great ideas for knitting with typography. It's suitable for all knitting skill levels.

The introduction includes how to customize projects, information about yarn and gauging and fairly complete diagrams for a beginning knitter.
The beginning knitter instruction include:

  • Casting on
  • casting off
  • knit stitch
  • purl stitch
  • increasing
  • decreasing
  • picking up stitches
  • different seam methods
  • working with colors including Fair Isle, intarsia and color changes
So for the complete beginner who is patient and able to learn from books and diagrams, this will get them started. Then you get into the projects.

The projects all include lettering of course, just letters by themselves, or words. Most of them are very simple with good charts, and a lot of them are the kinds of projects I like best, functional and interesting. Yarns are listed by brands and weights, and needles are listed by US size and MM.

My favorite stranded projects include the Slab Serif collegiate looking children's backpack, the French press cozy with the word CAFE in a stenciled inspired font (pictured on the cover) and calligraphic black letter e-reader cover with the words "ex libris".  There are a lot more projects than that, including some great children's projects.

The 3D letters pictured on the cover are more involved with more seaming and shaping, and more advanced knitters would have fun with those. As well as the LOVE pillows, there are also bookends that are the letters A and Z for witty knitty fun. 

At the end of the book are alphabets in the same style as the project instructions. You will find Sans Serif, Serif , Black Letter and Script in both upper and lower case letters, Slab Serif, Stenciled, Circus and Western in upper case so you can develop your own patterns with those. Numbers and Punctuation are only offered in one font style, a very clean Sans Serif. 

This is a fun themed book. My daughter and I will be using it often in projects of our own designs and the projects included are easy to customize to our own tastes. It's one that I recommend to beginning and intermediate knitters, and to font addicted crafters. 

Published by Chronicle Books


I received a complimentary copy of this book to review, I received no other compensation, and my review is my honest opinion of the book. You can read more about my review policy here.

Monday, March 18, 2013

How to make a comic book cover clock

Comic book cover clock


As I've mentioned before, my family is happily geeky and comic book love falls in that geekdom. So we have boxes and boxes of comics and some of them are in less than pristine condition. Never, ever cut up a comic unless you know that it's not a collectors item, preferably only comics in "loved"condition. The comic above isn't valuable and I have duplicate copies of it.

You will need:

  • comic book with an intact cover
  • thermal laminating machine 
  • 3 or 5 mil letter sized pouch (I used 3 mil- glossy)
  • small sharp scissors
  • paper trimmer or large scissors
  • pen- ball point worked on my laminating pouches
  • Clock movement kit- I used #10043 from Klockit, the shaft is short, and perfect for thinner faces.
  • hands for the clock- you can pick free hands from Klockit when you order the movement, a second hand costs a little extra
  • battery for the clock
About thermal laminating machines- I have a couple of them, the one I used is a very fast Black and Decker model that is a little on the pricey side. A much less expensive option that does take a little while to warm up is the Scotch thermal laminating machine. I have one, and used it for years, and can recommend them for hobby use. Links to both at the bottom of this entry!

So to start, open your comic to the middle and unpin the staples to remove the cover intact. It's easier to trim it straight if you can cut right along the fold or in the case of my comic, it had a line down the middle. 

Cut the cover in half, then find the middle. You'll bring the top and bottom edges together, and make a small crease approximately in the middle of the fold.

Repeat lengthwise, then you'll have a small folded + in the middle of the cover.

Now the thing about lamination is there has to be an outside edge of the lamination for it to be sealed. So to create that edge for the hole for the clock shaft to go through, I used the brass washer from my clock kit and traced around the outside of that. Place it directly over the + and trace with a pen.
Then cut out the hole using the small sharp scissors, cut just slightly outside your traced line.

Now you put the page in your laminating pouch, and run it through your laminating machine. 
Now you need to cut your hole for the clock movement shaft. This time I used the larger of the 2 hex nuts that were in the kit and traced the inside.
Use the small sharp scissors again to cut out the hole. Then check it on the clock movement, if you need to make the hole a little bigger trim just a shaving around the edge until it fits.
Now it's all set to go, pull out the clock movement and trim the edges around the cover remembering to leave at least a 1/8th to a 1/4 inch of clear lamination all around the edges. Then install your clock movement following the instructions that came with it.

Now you have you own comic book clock! The same technique will work with all sorts of paper projects, the key is having a fairly stiff lamination. When you hang it, it will stick out from the wall the same distance as the clock movements thickness.

About The Warlord- The Warlord was written and illustrated by Mike Grell, and it was one of my favorite comic books when I was a kid. My mom didn't like me reading comics so a lot of the time my Uncle Lamar would sneak them to me. He was fond of all sorts of titles, but mostly not the superhero books. The Warlord was a favorite of his. I'll probably make another one of these with a Green Lantern cover for my husband. 


Saturday, March 16, 2013

Crochet Inspired Mandala redux

crochet inspired mandala
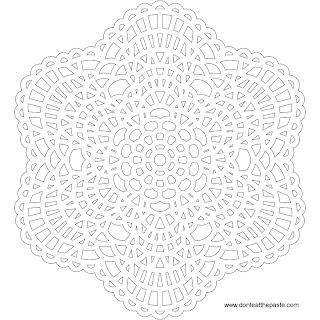
A while back I posted a crochet inspired mandala, and decided yesterday it was time for another one. I love crocheting doilies. I never have any place to put them when they are done so they usually wind up given to a friend. Building a doily in the round is a lot like making a mandala, and generally I work without a pattern, just playing with the thread to make simple designs. I'm also very bad at keeping notes while working on them, so generally don't share the patterns. I think I'll try to crochet one based off this mandala though, with notes!

Click on the images for larger versions to print and color.

Small JPG version:
crochet inspired mandala to color

Large transparent PNG version:

Wednesday, March 13, 2013

Why the Amazing Turnip Girl is Amazing

The Amazing Turnip Girl this evening

My children frequently take me by surprise by how very centered and good they are. The eldest is 22 and still very involved with us, and always has time to shovel his grandpa's walkway.

My youngest, the 17 year old is a mix, at times she seems to be so much older in her quiet maturity. Then she's young and playing. She told me when she was 11 and saw girls her own age wearing make up that she thought it was dumb. "I have 18 years to be a kid and the rest of my life to be a grown up. Coloring on paper is more fun."  It floored me, that she had thought it through that way. But she does that frequently, thinking things through to a finish that comes as a surprise even to the people who know her best.

The other day after a heavy snowfall, she shoveled the driveway before her Dad got home from work completely unasked. Then the next day, she started building a snow TARDIS.

She worked on the base for hours, using a box as a mold for bricks. Then came in when it started getting close to sundown. The next evening she was back out again and got it probably 3/4s of the way done. Her brick mold had fallen apart and she was packing snow into a careful rectangle using gloved hands.

Then after she came in, she decided to tape up one of my Amazon A3 shipping boxes (I use Amazon boxes to mulch if I don't recycle them)- she coated it inside and out with duct tape to use as a sturdier, more water resistant brick mold.

This afternoon, some kids kicked over the TARDIS that was 3/4s of the way done. Her dad was furious.

Now, this is why the Amazing Turnip Girl is amazing- she wasn't mad, she wasn't sad. She had a brand new brick mold and whole new plan anyway. She started building on what was left of the base she had built.
Snow TARDIS
So I asked her "Are you mad about your TARDIS being kicked down?"
She said "Not really. I learned that the snow that is more like snow cone snow sticks better together, and this mold works a lot better."
Snow brick mold

That's why she's my hero. Because I tend to fret when things go wrong, and to dwell on it when they go wrong and it's not my fault. I get angry, resentful and have to make a conscious effort sometimes to let it go and move on. Not all the time, but often enough. She just didn't, she got back to work and had it all built a lot quicker because of what she learned from the first one.

Then she came in and made hot chocolate. 

Book Review- The Spinner's Book of Yarn Designs

The Spinner's Book of Yarn Designs by Sarah Anderson

The Spinner's Book of Yarn Designs- Techniques for Creating 80 Yarns by Sarah Anderson took longer than expected to review because it's so good. If you spin yarn, or if you're a knitter or crocheter who is considering learning, you'll want this book.

You won't learn how to spin with this book, what you'll learn is ways to make amazing and unique yarns. The introduction does have a lot of tips for spinning, buying tops and fleece, and even how to pick a whole fleece if you're willing to clean and card it. She also talks about carding methods which is important for both the types of yarn you want to spin and for color work from colored fiber.

She shows ways to create colorways from the fiber batts that are just gorgeous. If color is your passion, you'll love seeing the wild batts she makes and the examples of things she makes from them. Then she gets into various ways to ply yarn to create wonderful textures and appearances.

What makes this book fantastic other than the amount of detail and the well photographed images is her instructions and tips. She writes it very well and engagingly, making it very easy just to read it for artistic inspiration. She also has experimented with various plys and spinning styles to test durability for socks and those experiments are interesting to read. She tested them fairly by knitting a pair of matching socks, one with a control yarn and one with the yarn she was testing then wore them to see which wore out first and how. Those are also very well photographed.

My favorite chapter is techniques that a little beyond my abilities right now. The final chapter combines color and texture to create beehives and other types of really gorgeous novelty yarns that make my fingers itch to want to try in a simple knit design.

You will learn how to make loops, slubs, spirals, and beaded accents on your hand spun yarns and enjoy the great examples of what can be done with the finished yarn. If spinning is something you want to learn, or that you already do, this book is eye candy, inspiration and instruction.

Published by Storey Publishing- Like them on Facebook for free recipes, craft projects and contests to win books.


I received a complimentary copy of this book to review, I received no other compensation, and my review is my honest opinion of the book. You can read more about my review policy here.

Tuesday, March 12, 2013

Irish Blessing coloring page

Irish Blessing
May God give you...
For every storm, a rainbow,
For every tear, a smile,
For every care, a promise,
And a blessing in each trial.
For every problem life sends,
A faithful friend to share,
For every sigh, a sweet song,
And an answer for each prayer.
I hope you enjoy this coloring page, it's one of my favorite blessings. The knotted frame is 5 symmetrical strands if you want to color in each strand a different color. The font used is Cari Buziak's Aon Cari Celtic, and available on Aon-Celtic. Cari has also posted some of the best knotwork tutorials around if you'd like to learn to draw your own. Click on the images for larger versions. The colored version above is posted on my FB page if you'd like to share it.

Small JPG version:
knotwork coloring page - Irish Blessing

Large transparent PNG version:
knotwork coloring page - Irish Blessing

Sunday, March 10, 2013

Drawing winners and The Empty Bowl

First, the winners of the 2 drawings!

The QuadraFire Pellet Stove sponsored drawing for the teeshirt and notebook was won by WaterWaves
The Apartments.com drawing was won by AubreyLaine.

The Amazing Turnip Girl picked both winners randomly from a bowl. Congratulations to you both, and thank you to everyone who entered.

Learn more about SocialSpark, the site that connects sponsors and bloggers for contests like that.

Yesterday was the Annual Empty Bowl event here. I didn't bring my camera because I was in a fair amount of pain and didn't want to fuss with it, but it was a blast.

Empty Bowl is an annual fundraiser for our local soup kitchen. Unlike a lot of fundraisers, this one is very casual, and it's immensely popular. Potters and clay artists from around Alaska at all sorts of skill levels donate handmade bowls, thousands of them actually. With your 25 dollar ticket, you get to choose 1 bowl, and have as much soup and cornbread as you can eat. My kids look forward to this event, as do my husband and I.

This year, because I was hurting so badly when I woke up, we wound going a little later than usual. So we worried that the bowls would be pretty well picked over, but they just keep putting out new ones until all the bowls are gone and there was a great selection. I had my eye on 2 different bowls, both used the same color glaze and it's a color I must like because when we got home we found out they "matched" several other bowls from previous events. I finally settled on a tapered deep bowl, part of me still wanting the other bowl. Then my husband picked his bowl, and wouldn't you know it? He picked the other bowl. We must have the same tastes after all these years. TG and William took a little longer to choose their bowls. William picked a bowl that had a very plain outside and almost looked like crystal slices on the bottom of the inside. He really loved how it looked so ordinary until you saw into the depths of it. TG of course picked a bowl that was TARDIS blue, or as close as she could find. It's actually a blue and cream bowl.

My husband and I went to get soup while TG and William were choosing bowls. Our local soup kitchen is named Bean's Cafe, and the soups served are always bean soups. They hold a yearly contest to choose the recipe for the soup and do one vegetarian soup and one meat soup. The meat soup had bacon and kale in it, and the vegetarian soup was a creamy, cheesy soup with potatoes and beans. Michael and I both got the meat soup first and found a place to sit. Then the rest of our family joined us. It was pretty good soup and everyone sitting our table was friendly. Of course, TG can find a fellow Whovian anywhere and she and another lady compared matching TARDIS keyrings.

After we finished our first bowls, TG and I were full, Michael and William both went back to try the vegetarian soup. I had a bite of Michael's and OH GOSH it was so good. After they finished, we headed back to the car and Michael and I talked about what we liked about the vegetarian soup and possible ways to incorporate some of those things into a soup recipe of our own. TG and I discussed the possibility of entering the soup contest next year. One of the things Bean's Cafe does with the winner's soup is create bean mixes with the recipe for the soup as a fund raising item which they sell throughout the year.

I love our bowl collection. Last year, I picked a bowl that would nest with the one William picked so he could start a bowl collection of his own. All those pretty bowls from Empty Bowl events get used throughout the year and make me smile. They don't match, except some of them in color. They are different shapes and sizes, and all made by local artists and every one of them a memory of a nice lunch with my family to support a cause we really believe in. We help Bean's Cafe throughout the year, with inkind donations as well monetary donations and this is our favorite annual charity event.

After that, we went to the hardware store to look at lumber options for my garden beds this year. That was good too.

And if you read this far, do any of you grow horseradish? I'd really appreciate tips. Or if you're feeling really generous, maybe a root to plant this year?

Saturday, March 9, 2013

Eggs and Bunny Easter Gift Box


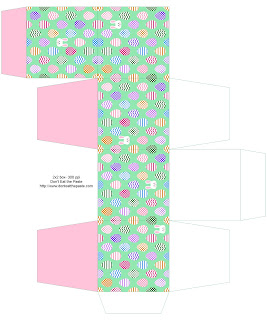
My first Easter printable for 2013, a little egg and bunny themed box. I hope you enjoy this printable box. I may wind up doing more with this fill because I really like how cute it turned out. Would you like to see more printables with this pattern?

Click on the image for a larger version. Print at 8x10 inches on card stock, cut out, score folds, glue. 

Printable eggs and bunny Easter box


Thursday, March 7, 2013

Easy Quick Fabric Clock Project

Quick fabric clock project DIY

I love clocks that tick. It's soothing, especially when I'm going to sleep. I'm less fond of chiming clocks but you could do this with a battery operated chiming movement as well.

You will need:

  • 8 x 8 inch square of fabric with pinked edges 
  • 6 x 6 x 5/8 inch canvas (I got mine here)
  • Quartz clock movement (I got mine here)
  • Hands that are less than 2.5 inches long
  • staple gun (there's a link to the one I use at the bottom of the project)
  • ruler
  • pencil
  • Mod Podge matte
  • Foam Brush
  • button for 12 o'clock spot
  • thread and needle
  • Scissors or craft knife


The first part is super easy and makes a great way to showcase Spoonflower swatches as well (oh! Or use a Spoonflower swatch to make a clock!)- You're going to wrap the canvas with the fabric stapling it in place on the back of the stretcher bars. Fold the corners in for nice neat corners. Which turned out less than perfect on my clock, so if you have fabric that wants to get bulky or balky, trim the corners a bit before folding the corners in.

You need to mark the center for the shaft of your clock movement. To do that, use a pencil on the back of the canvas. Using a straight edge, draw a line from one corner diagonal to the other corner, repeat with the other two corners. Then you'll line the ruler up square with the middle which is where the diagonal lines meet, and draw lines vertically and horizontally.

Do you see the bit of thread peeking on the right hand side? That's the 12 o'clock mark. Center your button over the vertical line on the front of the canvas, on the inside edge of the stretcher bar, and stitch into place. I found the easiest way to make that knot tight was leave a long tail, and then tie the tails in a square knot using  2 strands of embroidery floss to stitch the button in place.
(please ignore the hole, I took the photos AFTER this step)
Using the foam brush and a firm touch to really work the Mod Podge into the fabric, paint Mod Podge over the front and sides of the canvas. Let that dry for an hour, then put Mod Podge on the back of the canvas. Let both sides dry completely. This step makes it easier to clean and it seals the fabric so the hole you cut for the movement won't cause fraying.

Cut a hole using the guidelines on the back that's big enough for your clock movement shaft. 
The movement will come with instructions, so follow the instructions to install the movement. If you click on this image, you'll see the shaft of the movement I used poking up from the center of the fabric.

Put a battery in the movement, hang and enjoy!
You can also staple Spoonflower 8x8 swatches to 6x6 canvases for quick art work. The two shown are from my fabric collections at Spoonflower. 

The clock movement I got from Klockit is the #10043, there are price breaks for quantity. The size fits in the space between the stretcher bars of the canvas very well and the profile is the same depth as the canvas. Klockit does use SmartPost for standard shipping so if you're in someplace like Alaska, you could wind up waiting very impatiently and wishing very much you expedited shipping. They do have a great selection of movements, hands and second hands!

Tuesday, March 5, 2013

Knotted Shamrock to color or embroider

Shamrock knot


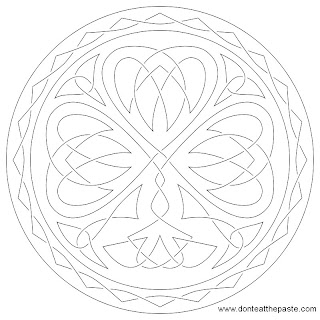
A new knot to color! This is the shamrock knot for this year, and if you click on shamrocks in the tags, you can find other shamrock themed mandalas, crafts, coloring pages and knots.

First- the embroidery line art version for my embroidering friends! 100 dpi for an 8x8 version, resize to your wishes. Click on the image for a larger version.
Shamrock embroidery pattern

Small JPG coloring page-

Large transparent PNG coloring page-
Shamrock knotwork coloring page

All of these would have been posted earlier, but I was playing with my new Kindle PaperWhite, then went out for dinner with my family. 


Saturday, March 2, 2013

Book Review- Waffles

Waffles are the new cupcake, or should be. This book, Waffles- Sweet, Savory, Simple by Dawn Yanagihara is a great example of why.

The introduction shows someone who is very enthused about these moist, crisp, perfectly pocketed food. It also discusses the ingredients used in most of the recipes and how those ingredients can affect the final outcome and how to figure out baking times for your waffle iron to make the perfect waffle. It also talks about freezing and reheating waffles and tips for making waffles.

Then it gets into the fun part, the recipes. Chapter 1-Waffles Plain and Simple, those basic waffles that allow your choice of toppings to shine. Most of the recipes in this book use baking soda or baking powder to make them rise, but the Belgian waffle recipe in this section is one of two yeast waffles and it's my favorite recipe in this section. It takes a little time to make but it's well worth it. For quicker, also incredibly tasty waffles, the Golden Cornmeal Waffles are crispy and make a good base for savory or sweet toppings.

Chapter 2 is Fruit, Nuts and Not-So-Plain Waffles, and has those breakfast waffles that a treat. You expect something like Wild Blueberry-Buttermilk Waffles which would also work well with other small berries, less expected but also very good, Spicy Pumpkin Waffles or Cornmeal and Bacon Waffles.

Chapter 3 is Savories, my son's favorite. He always prefers savory to sweet, and gets very excited about things like Smoked Salmon and Creme Fraiche waffles. If you really want to go over the top, Fried Chicken and Waffles with Bacon Gravy is another recipe in this chapter.

Chapter 4 is Waffle Finales which are dessert like waffles, some with a gourmet touch such as my personal favorite in the whole cookbook, Waffles with Sweet Goat Cheese, Cherries in Port Syrup and Toasted Almonds which start with basic waffles, then get gloriously topped. My daughter likes the meringue topped S'morish Waffles.

Chapter 5 is To Top It Off is toppings for waffles. I've made honeyed cream cheeses before but never thought of maple syrup cream cheese which is simple, easy and good. Lemon Curd is more time consuming but an absolute classic with scones that works well with waffles as well.

The book has gorgeous photographs, well written recipes, and is hard cover bound. It would make a good gift as well as being a nice themed cookbook in your collection. A good index and table of contents make it easy to find specific recipes. Recipes have measurements both by metric weight and by American volume. I definitely recommend it to waffle enthusiasts.


I received a complimentary copy of this book to review, I received no other compensation, and my review is my honest opinion of the book. You can read more about my review policy here.