Pages

Thursday, January 31, 2013

I love Avocados from Mexico!

This is a Sponsored post written by me on behalf of Avocados from Mexico for SocialSpark. All opinions are 100% mine.

Avocado Apron


I love avocados. Especially when it's 10 degrees outside and all covered with snow because avocados taste like summer to me and my family. The photo above is my daughter in a fun apron with great big pockets that declares that avocado love. In her hands are Avocados from Mexico that will be a part of dinner tonight. Even in Alaska we can get gorgeous avocados for that summer flavor!

The apron is from Avocados from Mexico Cafe Press store where you can get lots of great merchandise to share the avocado love. The apron has great big pockets, and this one is the Red Hot design under the 2013 I Love Avocados tab.  Nice sturdy fabric and the design prints very well.

You can share your love for avocados, give virtual avocado gifts and download screensavers, ringtones and blogger badges from Share the Avocado Love Facebook app. I just sent this note to my friend Susan (last name removed for privacy)

Avocado Facebook App

So what are we having with avocados tonight? A family favorite. Chicken sandwiches with what we call "Green mayonnaise"  which is a mix of avocados, mayonnaise and garlic. The chicken is cooked with onions, cumin, salt and pepper, topped with cheddar or pepperjack cheese, served with sprouts on toasted whole wheat buns that are spread with the green mayonnaise. It used to be, I'd buy just one avocado and make enough just for dinner, but my family loves the spread so now I make extra for sandwiches the next day. It's easy, and so good! 

AFM_Logo_stack_NoTag_zps2eae3188-1_zpsaf020678-1_zps928fee63--

They are also having a Twitter party on February 7th between 3:pm and 4:pm Eastern which is 12-1pm Pacific and here in Alaska 11 am to noon. I'll be there! Just follow @guacgrl or hashtag #iloveavocados to be part of the fun. There will be over 500 dollars in prizes including gift cards and CafePress gift cards. If you've never been to a Twitter party, here's your chance. I'll be there! 

Visit Sponsor's Site

Wednesday, January 30, 2013

Butterfly Rainbow Mandala to color

Rainbows, flowers and butterflies mandala
I want it to be spring already! I'm planning my garden, looking forward to seeing how my strawberries and raspberries come back and talking to my son about our plan for a dandelion recipes zine/ebook. (I'll make a limited number of physical booklets and also sell it as an e-book)

But it's still cold, and wintery and not anywhere near spring.
Hopefully this butterflies, rainbows and flower mandala to color helps you feel in a spring mood too.
Click on the images below for a larger version to print and color, or use for embroidery or whatever else you might want to use a happy butterfly and flower mandala for!

Small JPG version:
Butterfly and rainbow mandala to color

Large transparent PNG version:


Monday, January 28, 2013

My other entries for the Duck Tape contest


A few people has asked if I submitted other designs to the contest. Yes! I did. Only one design per designer could make it to the finals, but you could enter every day. I didn't enter quite every day, but did draw a few designs and enter them. Click on the images to see larger versions.
The other question I get asked a lot is when is the tape coming out. I have no idea! None. But when I know, I will announce it here!

Which one is your favorite?

Crayons
Crayons! Everyone loves crayons right?

Spirals, stripes and dots. A recurrent theme around here!

Cookies! I think there should be a tape to celebrate home cooks.

Eyelet lace

Strawberries! (I'm really looking forward to summer and my strawberry patch)

Rainbows are just fun!

Moons, swirls and stars. Also something I draw a lot. Mostly because my friend Melissa loves anything celestial.

Scrappy Flowers with button centers

So what do you think? I love the owls, and it's my personal favorite. My second favorite is the baking design.  But it's close, because spirals, dots and stripes are one of my favorite things too.


Sunday, January 27, 2013

Goldfish Printable Box


I hope you enjoy this quickie goldfish printable gift box. Click on the image below for a larger version, print on card stock, cut out, score, fold, glue!

Goldfish printable box
Currently I'm working on new crochet  little panda stuffie. The pattern will be posted after it's done.

Thursday, January 24, 2013

Printable Andes Mint slide boxes hearts and stripes

Printable Andes Mint slide box- hearts and stripes

New template! I've posted a few slide boxes that fit 4 mints (you can buy a blank template here or here)- this template isn't listed yet. It will hold 6 Andes Mints, and fits 2 to a page.
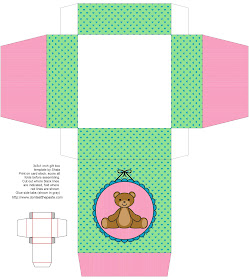
Click the image below for a larger version. It needs to be printed at 8x10 inches to fit Andes mints. Print on card stock, cut out, score, fold, glue!


Monday, January 21, 2013

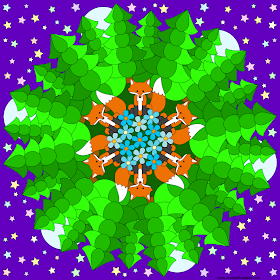
Fox Mandala to color

Fox Mandala

I hope you enjoy this mandala, it was a lot of fun to draw it! Foxes, flowers, trees and stars form 6 sides to this one.

Click on the images for larger versions.

Small JPG version:
Fox mandala to color

Large transparent PNG version:

This weekend I decided that this week I'd re-read the Harry Potter books. So if you see a lot of wizard-y stuff in the next week or so, that's the reason why! Yesterday was year 1 and 2 and half of 3. Today I plan to finish 3 and possibly 4. Yay!

Buy the Don't Eat the Paste Mandala Coloring Collection! It has this and 49 other mandalas from this site.

Saturday, January 19, 2013

DIY Glitter Photo Pendant


Tutorial- glitter photo pendant

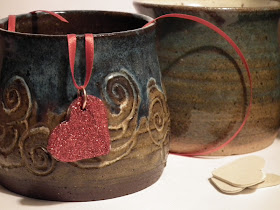
This little pendant is kind of like a locket, except it doesn't lock, and it's pretty quick to make except for curing time. Mine has photos of my kids in it.


You will need:

  • Wood shapes- I used hearts!
  • drill with a 1/8 inch drill bit and something safe to drill on
  • 220 grit sandpaper
  • optional- painter's tape
  • paint
  • fine glitter
  • decoupage medium
  • foam brushes
  • Photos or pictures for the inside
  • 1/8 inch hole punch
  • scissors
  • ribbon
  • large jump ring- either handmade or commercial
Quick notes- I used my Fiskars Craft Drill, it's hand powered, quiet and easy to use. The glitter is Martha Stewart -Garnet, and the jump ring is made from 18 gauge copper using a knitting needle as a mandrel. The hearts were from a mixed bag of heart wood shapes.

You'll need two shapes the same size and shape, so if you have a bag of shapes, sort through and pick out 2 the size you want to make the pendant.

Then it's time to drill them. I used painter's tape to wrap them securely together. That let me drill both pieces at once to have the holes in the right place, plus wrapping them in tape helped keep the soft wood from splitting. You can also drill one, then use it to mark the other one to drill it.
Now take them apart if you've taped them together, and sand both hearts smooth. Then you'll paint them. They need to be painted and glittered in mirror image to each other so there is a front and back. Let the paint dry, then put on a coat of decoupage medium and GLITTER!
After the decoupage glue has dried, add another coat to seal the glitter so the finished pendant isn't leaving glitter everywhere. Let dry.

Then it's time to start with the photos. Measure your hearts to resize photos to fit, or draw little pictures on paper or cut images from a magazine. It's your choice, it's your necklace. Trace the hearts on the image, paying attention to where the holes will be so you don't accidentally wind up with a hole in the wrong place. Cut out just inside the outlines using the scissors. Place the heart over the image, and mark where the hole is to punch it. Repeat for the other image remembering they need to be mirror images for hole placement.

Decoupage the unglittered sides of the heart with the images.  Make sure the holes are clear using some sort of needle type tool.


Let the hearts cure,  Over night should do it.

Then you just need to connect them with the jump ring and hang from a ribbon!

You aren't limited to just hearts of course, stars will work. If you wanted, you could make a mini book by cutting pages to fit, punching holes and using a bigger jump ring. 

The cups in the photos are made by Silverbear Sundries

Thursday, January 17, 2013

Olive Ewe Printable Gift Box


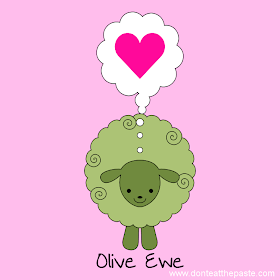
Remember my Olive Ewe printables earlier this month? I decided it was time for a gift box as well.  Does anyone want to see this little sheep on a mandala or coloring page?

Click the image below for a larger version to print. Print on cardstock, cut out, score, fold, glue. If you have issues printing, download the image and print to fit page from a graphics program OR switch to Chrome browser, it handles higher quality images better.

Olive Ewe cute printable Valentine box

I'm working on a new craft project that will be put up probably tomorrow and planning out some printables that will use my chocolate slide box templates. 

If you aren't already following me on Pinterest   you might not know my daughter is pinning to my board. We decided because we both use the same browser, it's easier to give her a board on my boards then for me to have to sign her out and sign myself back in every single time I want to pin. Her board is the Turnip Girl board, and it's full of geektastic pins. Heavy on Doctor Who of course, but also other geeky crafts or things she found interesting. 


Tuesday, January 15, 2013

DVD Review- Carving Swedish Woodenware

Carving Swedish Woodenware

Imagine you're lucky enough to get a chance to take a class with a master woodworker who specializes in gorgeous spoons and bowls. That's what this dvd is like, except better, because you can stop, rewind and watch a section a few more times if you need to. Jögge Sundqvist is that master.

This is a re-release of an older video. The older video is good quality and it is on par with my favorite craft shows and dvds that are currently being produced.

Mr. Sundqvist is an enthused teacher, who starts from green (fresh cut) wood and using hand tools creates bowls that can be used as dough bowls or as a gorgeous fruit bowl centerpiece and spoons from the wood. The tools used are easy to find, an ax  an adze, a knife and gouges primarily with spoke shaves for finishing parts of the bowls.

He takes you step by step from splitting the wood to make a bowl and picking the best pieces and designing the bowl to fit the wood to what branch shapes make the best spoons. He shows each step of the process clearly, demonstrating how he holds the knives for safety and how he positions himself to chop the wood.

I love the bowls, and they are a great project, but I have a weakness for handcarved usable wooden spoons in my kitchen. The spoons demonstrated are gorgeously shaped, elegant and frequently decorated with pretty carving.

He talks about the history of wood carving in his family, and one of the things I loved was the obvious deep pride he takes in his work and in his home.

Recommended absolutely for people who are considering hand carving, for people who want to learn more about making wooden spoons and bowls and just because it's a very enjoyable DVD. It's one I watched with my family, and they all enjoyed it, and feel very confident about making me lots of wooden spoons and even a few dough bowls this summer.

Published by The Taunton Press- the publishers of Fine Woodworking Magazine.

I received a complimentary copy of this book to review, I received no other compensation, and my review is my honest opinion of the book. You can read more about my review policy here.

Printable Quote about reading

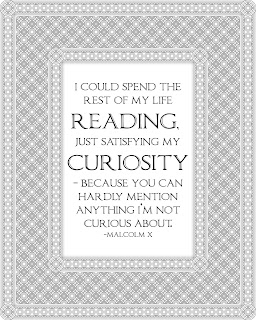
Reading quote by Malcolm X
"I could spend the rest of my life reading, just satisfying my curiosity — because you can hardly mention anything I’m not curious about."
Malcolm X
I hope you like this printable quote. I like printing black and white quotes on Astrobrights paper because they look so bright and pretty. This one was printed on Rocket Red and is hanging on my living room wall now. The above version can be shared on Facebook from the Shala's Beadwork and Printables page.

Click the image below for a larger, printable version.
Malcolm X quote about reading- Printable

Monday, January 14, 2013

Beaded hair clips


You can find instructions for these quick to stitch flower clips on Beadwork at BellaOnline. I made them last night while reminding myself that I really, really need to order reading glasses soon. I'm very near-sighted, and my current prescription is set up for distance. For close work and reading, I was given a weaker prescription. Why reading glasses and not bifocals? Because when I'm reading, beading or crafting, I'm doing it for hours at a time. Reading glasses are more convenient then bifocals for me.

More later. I need to write it all a little more coherently then I did earlier.


Saturday, January 12, 2013

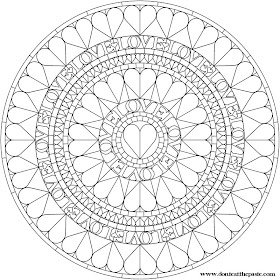
Hearts Mandala to Color


I hope you enjoy this mandala. It originally started out a lot simpler, but one part kept bugging me, so when I fixed that part, I wound up adding in the detail lines. Hearts and love!

Click on the images for versions to download and print.

Small JPG version:
Heart mandala to color or embroider

Large Transparent PNG version:


Wednesday, January 9, 2013

Olive Ewe Valentines and Printable Art

Olive Ewe Valentine

Olive Ewe! I hope you like this little Valentine sheep as much as I do. If you don't understand the joke, say the words Olive Ewe out loud. Better, say them to someone special.

Click the images below for larger versions.

8x10 Printable Art:

Printable Cards: Print on card stock. Cut outside black lines and horizontal center black line. Fold each card in half on the black line in the middle and write a message inside!


Tuesday, January 8, 2013

Slip Stitch Pinstripe Scarf- Crochet pattern

Slip stitch scarf
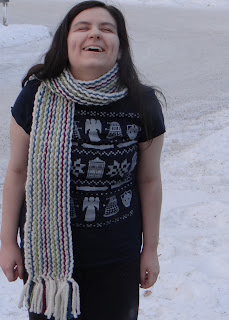
Scarf modeled by the Amazing Turnip Girl.


Slip stitch crochet fabric, also called Bosnian crochet creates a very fluid fabric when worked in only one loop that has a lot of stretch. A lot of crocheters avoid it because slip stitch crochet works up so slowly. This scarf works up really quickly showing off the thinner stripes of color you get with slip stitch because it's done in a super bulky yarn with a size Q hook.

You can find Q hooks at most craft stores. Look for Boye's Crochet Dude line for a set that includes 3 bigger hooks. The Q will be the big plastic one in the middle.

The yarn I picked is Michaels Loops and Threads Cozy Wool yarn. It's a 50/50 wool/acrylic blend. This will work with any bulky yarn. I chose the Cozy Wool because it's not as heavy as pure wool, but still has enough wool to be very warm for Alaskan winters!

Slip Stitch Pinstripe Scarf 
For the scarf as shown:

  • 2 balls Fleece Cozy Wool (cream)
  • 1 ball Thunder Cozy Wool (blue)
  • 1 ball Sweet Grass (green)
  • 1 ball Velvet (purple)
  • Size Q plastic hook
  • smaller hook for adding fringe
It took just a bit more than one ball of the Fleece, so there was leftovers in all the colors. My daughter loves the yarn and will be working with the leftovers and some balls she picked up for herself and will probably knit a horizontally striped scarf with them.

You could absolutely do this using worsted weight yarn and a smaller hook. It will take a lot longer, and you'll need to add more rows.

Make a slip knot with a loop to start, leave an end longer than you want the fringe to be.
With Fleece (cream)- chain 100 stitches loosely. If you want a longer scarf, chain 120 stitches. On the first stitch, place a stitch marker to mark that end of the scarf. I just used a scrap of yarn and tied it into a open loop to cut out later.

All Fleece colored rows start on this end. The colored rows start on the other end.
Break off, trim leaving an end as long as you want the fringe. (no ends to work in for this scarf! They will all end up being part of the fringe!)

Row 1: Make a slip knot loop with the Thunder (blue) leaving a tail for fringe and put loop on hook. Slip stitch in each stitch working in front loops only. Break off yarn leaving enough yarn for fringe.

Row 2: Fleece row, slip knot loop with an end for fringe, put loop on hook, slip stitch in front loops only, break off leaving end for fringe.

Row 3: Sweet Grass (green) row- Work as for Row 1.

Row 4: Fleece- Repeat Row 2.

Row 5: Thunder- Work as for Row 1.

Row 6: Fleece- Repeat Row 2.

Row 7: Velvet (purple)- Work as for Row 1

Row 8: Fleece- Repeat Row 2.

Row 9: Thunder- Work as for Row 1.

Row 10: Fleece- Repeat Row 2.

Row 11: Sweet Grass- Work as for Row 1.

Row 12: Fleece- Repeat Row 2.

Row 13: Thunder- Work as for Row 1.

Row 14: Fleece- Repeat Row 2.

Row 15: Velvet - Work as for Row 1

Row 16: Fleece- Repeat Row 2.

Row 17: Thunder- Work as for Row 1.

Row 18: Fleece- Repeat Row 2.

Cut yarn for fringe, 20 pieces of cream double the length of the fringe you want plus 3 inches for knotting. 4 pieces each of purple and green, and 10 pieces of blue. Pull each strand of yarn through the beginning and ending stitches to match the rows. Tie the ends of the yarn from the crocheting and the fringe pieces in overhand knots with 3 strands each close to the ending and beginning of the rows.

The stripes can be arranged in other ways. I chose a analogous color scheme with Fleece as a neutral stripe between each color stripe that looked like this.

But you could also do less stripes for a good scarf for a fairly conventional man working in a neutral and a color or even two neutrals. For my husband, it would be grey and green. Green is his favorite color and he prefers grey to black.

Or even rainbow stripes!!


Monday, January 7, 2013

Hound and Teddy Bear Printable Boxes


January 8, 1935- Elvis Presley was born. I hope you enjoy these two printable boxes that I made especially for the occasion. Inspired by the songs (Let Me BeYour) Teddy Bear and Hound Dog. This is the first dog I've ever drawn!
Click on the images for larger versions, print on card stock, cut out, score, fold, glue!

Hound Dog Printable Box- inspired by Elvis Presley's Birthday

Teddy Bear Printable Box- inspired by Elvis Presley's Birthday